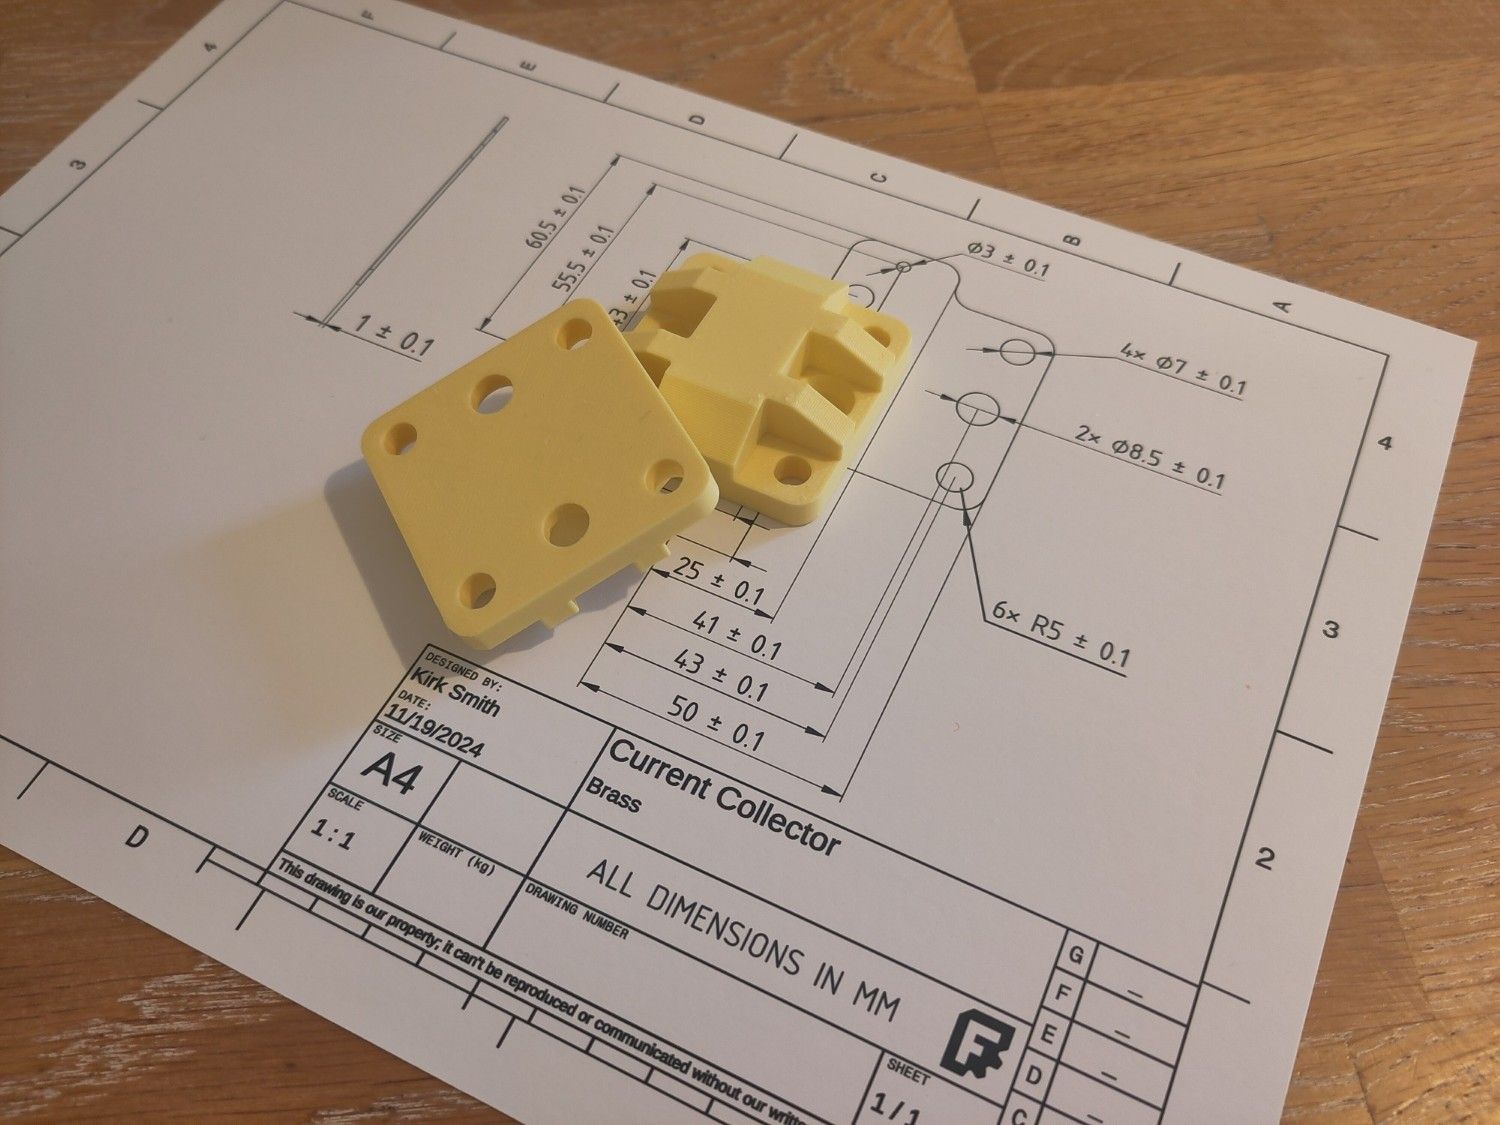
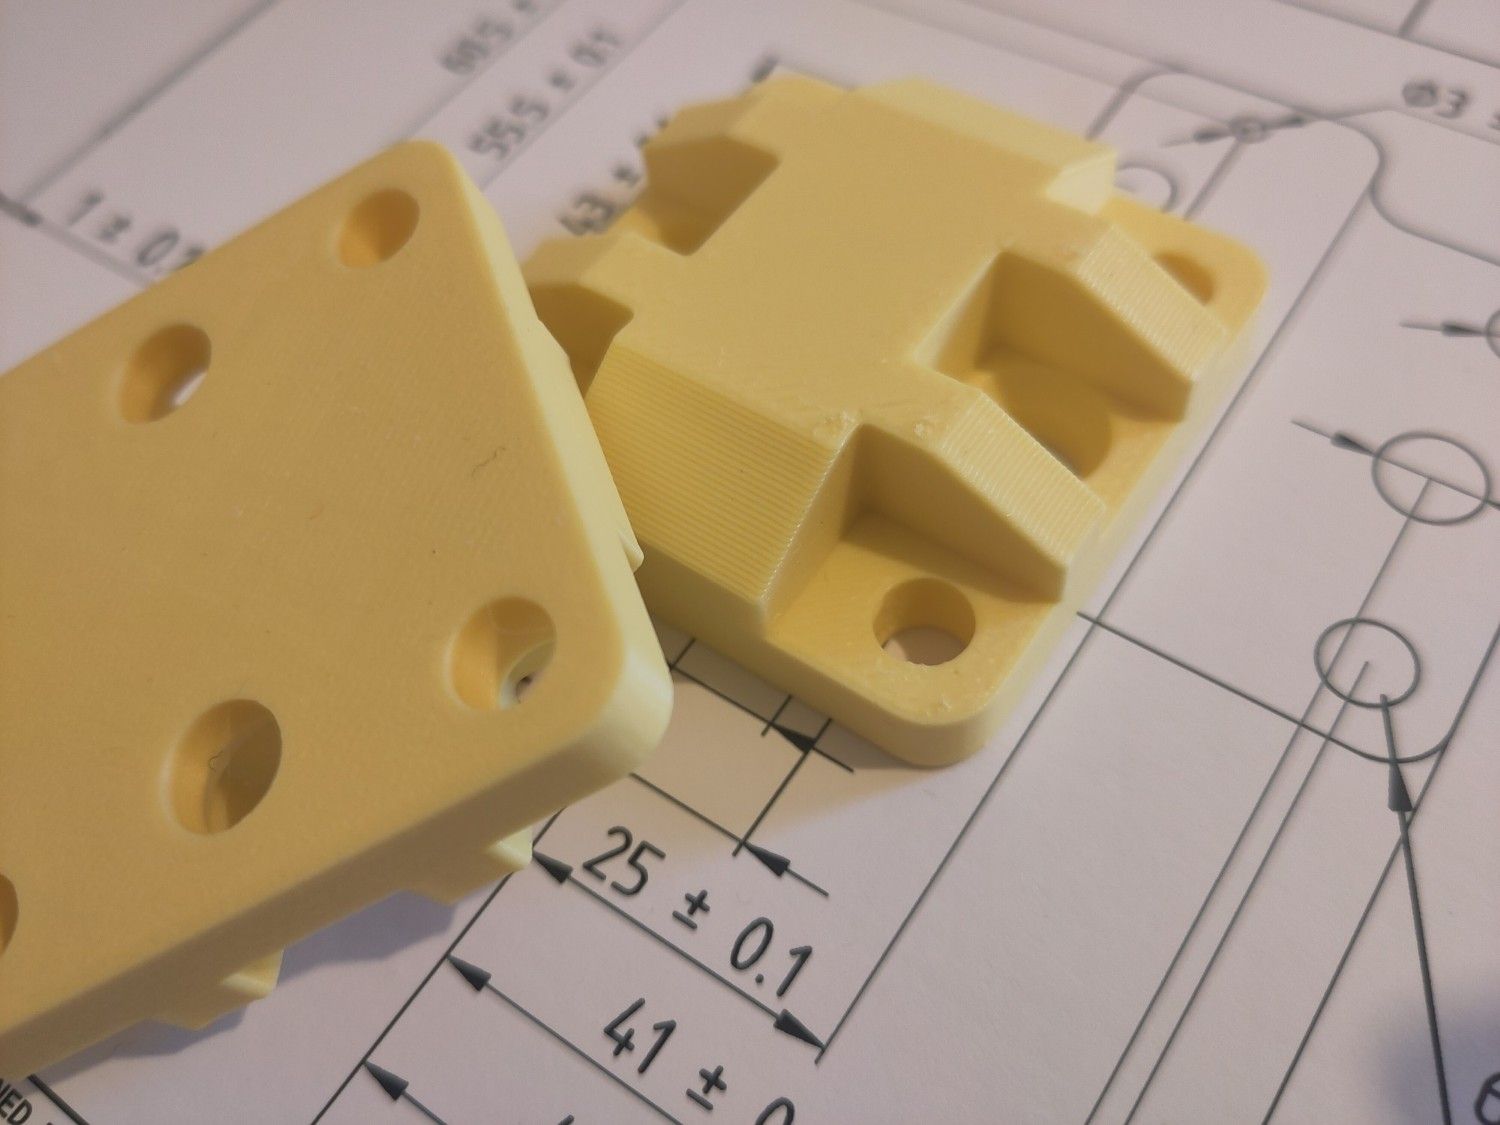
My build (very slowly progressing)
-
I've done it with just one flow frame: That seemed to be good. The problem with your proposal is that (at least that's what I think it is) the photo paper is permeable to air. I might put a piece of tubing on the second flow frame to test the seal on the whole cell. Then again, the only real test is to use some liquid. For that I need to wait for those pumps to arrive, which should be this or next week.
-
@sepi Nicely done! Also don't forget to wrap your screws in packing tape before you assemble the device for testing, otherwise the screws will short the cell.
@danielfp248 I actually used Kapton Tape but should probably use PP-tape instead.
-
I've done it with just one flow frame: That seemed to be good. The problem with your proposal is that (at least that's what I think it is) the photo paper is permeable to air. I might put a piece of tubing on the second flow frame to test the seal on the whole cell. Then again, the only real test is to use some liquid. For that I need to wait for those pumps to arrive, which should be this or next week.
@sepi said in My build (very slowly progressing):
I've done it with just one flow frame: That seemed to be good.
This sounds great. I also want to do the same then to eliminate as much of uncertainties as possible from the very beginning. It is always frustrating to identify such bugs after assembling everything together. For sure, the final test is the one with the liquids. Looking forward for your first tests with the pumps installed.
-
I've done it with just one flow frame: That seemed to be good. The problem with your proposal is that (at least that's what I think it is) the photo paper is permeable to air. I might put a piece of tubing on the second flow frame to test the seal on the whole cell. Then again, the only real test is to use some liquid. For that I need to wait for those pumps to arrive, which should be this or next week.
@sepi If you have an assembled cell with everything except the pumps you can use a syringe to manually pump some liquid through and see if you have any obvious leaks. This is how I normally test cells before I put activate material inside them or cycle water through them using pumps.
-
@sepi If you have an assembled cell with everything except the pumps you can use a syringe to manually pump some liquid through and see if you have any obvious leaks. This is how I normally test cells before I put activate material inside them or cycle water through them using pumps.
@danielfp248 Good trick, now I only need a syringe.
-
My Mystat finally arrived, yay! No I need to figure out how to flash that pic (hopefully no programmer neede) and get rid of the remaining 5 PCBs.
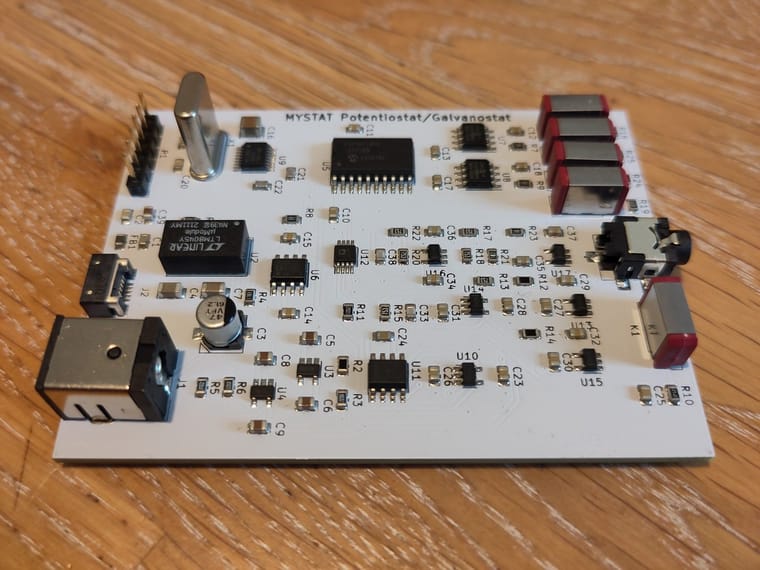
@sepi You do need a programmer to flash that. We use a PcKit3 programmer.
-
@danielfp248 noooooooooooo. I'll add: replacing it with an esp32, to the list of projects I will never do.
-
@danielfp248 noooooooooooo. I'll add: replacing it with an esp32, to the list of projects I will never do.
-
Yay, I got my MyStat working (a least to some extent). After fiddeling a bit with the yucky Microchip ISP software of which I had to install an outdated version (3.20 afaik) because they removed PicKit3 support, I finally managed to program Kirk's firmware on the device. Getting to run the python host software was fortunately pretty easy.
At first I was a bit stumped by an error message about an out of range current which I tried to calibrate away. It only occurred to me a bit later to connect the main PSU, which corrected the issue
Unfortunately I have some issues with commands that don't go through like the one for saving calibration to the device returning '?' instead of 'OK'.
Any Idea @kirk ?
-
I am less familiar with the MYSTAT hardware/firmware, that repository is a fork and you can see the original developers efforts much before mine! Just to say I'm not super familiar, @danielfp248 programed mine and sent it to me in the mail

Yes, the main PSU needs to be connected for current measurents to function.
Also a warning, make sure the MYSTAT is completely powered off and unplugged before inserting/removing the measurement cable to the MYSTAT, otherwise there is a risk of damage.
Are you following the calibration procedure from the original paper with a (IIRC) 1k resistor?
-
I am less familiar with the MYSTAT hardware/firmware, that repository is a fork and you can see the original developers efforts much before mine! Just to say I'm not super familiar, @danielfp248 programed mine and sent it to me in the mail
Yes, the main PSU needs to be connected for current measurents to function.
Also a warning, make sure the MYSTAT is completely powered off and unplugged before inserting/removing the measurement cable to the MYSTAT, otherwise there is a risk of damage.
Are you following the calibration procedure from the original paper with a (IIRC) 1k resistor?
Also actually @danielfp248 made all the code improvements to the repository for MYSTAT, he just dislikes Git and so I'm the one who uploads them
-
Also actually @danielfp248 made all the code improvements to the repository for MYSTAT, he just dislikes Git and so I'm the one who uploads them
-
@czahl ah I think @danielfp248 would know this answer, he has flashed most of the firmware but I don't remember him saying he made any changes. He is traveling right now so it may take him a bit to get back to us. I have only used the MYSTAT, I haven't dealt with the firmware myself. If he made any changes then we can push them to the repo ASAP.
-
@czahl We have never updated the firmware, we use the same one as the original mystat paper. Errors when saving calibration are often related with the calibration parameters being of the incorrect numerical type or the values being too large. There might be a bug in the UI around this. I'll check when I'm back from my traveling, however I dont remember having issues saving these values when calibrating successfully with the 1k ohm resistors.
@danielfp248 said in My build (very slowly progressing):
We have never updated the firmware, we use the same one as the original mystat paper
Are we talking about the same mystat repo? Again in my understanding this paper reflects the PCB from PcbWay, und this has the 4 reed relais (on top of the picture) for the 4 current ranges. In the main.c only the original 3 are handled.
Somewhere there is a mismatch, or am I'm looking into the wrong repo?
-
@danielfp248 said in My build (very slowly progressing):
We have never updated the firmware, we use the same one as the original mystat paper
Are we talking about the same mystat repo? Again in my understanding this paper reflects the PCB from PcbWay, und this has the 4 reed relais (on top of the picture) for the 4 current ranges. In the main.c only the original 3 are handled.
Somewhere there is a mismatch, or am I'm looking into the wrong repo?
@czahl I dont know which files kirk used to create that repo. I use the firmware directly from the repo linked on the mystat paper.
-
@czahl I dont know which files kirk used to create that repo. I use the firmware directly from the repo linked on the mystat paper.
@danielfp248 Thanks for the hint this is the reason. In the version referenced in the paper, the firmware is extended to support the 4 current ranges.
-
@czahl We have never updated the firmware, we use the same one as the original mystat paper. Errors when saving calibration are often related with the calibration parameters being of the incorrect numerical type or the values being too large. There might be a bug in the UI around this. I'll check when I'm back from my traveling, however I dont remember having issues saving these values when calibrating successfully with the 1k ohm resistors.
@danielfp248 said in My build (very slowly progressing):
however I dont remember having issues saving these values when calibrating successfully with the 1k ohm resistors.
I need to actually do the real calibration when I find the time. I'l report back then.
-
@danielfp248 I managed to get the mystat working correctly and calibrate it too. The problem was the firmware. I was using the one from @kirk's repo but that's the one working for only 3 current ranges. https://github.com/matthew-yates/MYSTAT/blob/main/firmware/firmware.hex is the correct one to use with the updated board. Should I create a pull request?
Hello! It looks like you're interested in this conversation, but you don't have an account yet.
Getting fed up of having to scroll through the same posts each visit? When you register for an account, you'll always come back to exactly where you were before, and choose to be notified of new replies (either via email, or push notification). You'll also be able to save bookmarks and upvote posts to show your appreciation to other community members.
With your input, this post could be even better 💗
Register Login