Rieke & the rest of your team,
First off, apologies for the delay! It's been quite a busy period, I'm sorry to keep you waiting.
I personally think Option 1 would be more useful in terms of research output. While end-scale RFBs will have systems to address potential leakage - and leakage can certainly happen (see https://fbrc.nodebb.com/topic/54/the-ultimate-demise-of-my-last-redflow-zcell) - leakage should not happen, at all, period. It is a design/system failure that should be extremely rare and controlled for, and systems will usually already have a form of secondary containment, so that leakage doesn't enter the local environment. It would be hard to quantify in the ways you ask, since normally if there's a leak, you stop everything, fix the source of the leak, and start over.
For Option 1, the electrolyte and membrane choice certainly do affect each other, but also strongly affect the system as a whole, independently. I think it would be hard to just isolate to their linked effects between electrolyte and membrane.
@Rieke-Huesmann said in Life Cycle Assessment (LCA) for the FBRC redox-flow battery:
Information we would need (please provide as much information as possible):
• How the selected electrolyte interacts with different membrane materials and which parameters are considered for choosing the electrolyte-membrane pairing
At FBRC, we have selected membranes that are easily available (ruling out exotic ion-exchange membranes), affordable (so no Nafion), and chemically compatible with the electrolytes we test (so, in neutral/acidic aqueous media, oxidizing/reducing conditions).
Purely in terms of material properties, a good membrane will have a high selectivity-it lets the ions you want (supporting electrolyte ions, e.g. potassium, chloride) through, and blocks ions you don't (e.g. charged triiodide molecules). Normally, an ion-exchange membrane (IEM) will allow either cations or anions through. Because there are no good cheap IEMs available for our use, we have just been using paper and other porous separators designed for batteries, like Daramic (designed for lead-acid systems). These are not very selective, but they are good enough for our use. A bonus of porous separators is that they are more conductive than IEMs, which leads me to...
Conductivity - this is just Ohm's Law, V = IR. You want the membrane's resistivity R to be as low as possible, so that the voltage drop across the membrane V, which is wasted energy, is as low as possible at a fixed current I. Resistivity is simply the inverse of conductivity. Again, we don't actively screen for this, because we find Daramic and paper to work well enough for testing - but it is because they meet our criteria. Nafion would certainly be more selective, and give us higher couloumbic efficiencies, but would be less conductive and cost way more (probably worse environmentally too, since it is fluorinated and has a complicated manufacturing process vs. porous separators).
So, to resume: availability, affordability, selectivity, conductivity (you want all of these values to be high!).
• Measured efficiencies of the current electrolyte-membrane selection
Here are the rough efficiencies for the system, they are likely slightly improved with some modifications we've made since this blog post: conditions, and results.
• Background on membrane selection in the development kit (e.g. which specific materials were chosen and why)
addressed above, I hope!
• How is the material wear currently counteracted (replacement only)?
Right now, we use a new membrane/separator for each test, in order to have repeatable results. It's possible to replace separators in a real stack but it would be very labor intensive/cost-prohibitive in a real stack. To my knowledge, I haven't heard of companies replacing membranes in the field, unless they have a big failure and they're under warranty - they probably just send the whole stack back to the factory and replace it with a new one, I'd wager.
• How is waste (wastewater, solid waste, co-products from chemical manufacture) disposed of?
Great question! We don't really have good answers on that. You'd have to look into the specifics of Nafion or lead-acid battery separator production (a very established industry). Also, for the chemicals we work with, they are all available at scale already: zinc chloride, potassium iodide, etc. I'd hope these are known already for their supply chains? I don't have knowledge here I'm afraid. Established chemical commodities like those probably don't have much waste, but could generate co-products as a result of their manufacturing. Iodine and zinc are both recycled, certainly.
At the end-of-life of an envisioned, full-scale RFB system - an inorganic electrolyte like Zn-I could be recycled with conventional chemical processing means (pH adjustment, precipitation, filtration - lots of techniques for aqueous inorganics). The reservoirs and stack could be recycled, but I doubt immediately reused. Metal current collectors, those are recycled easily. Plastic reservoirs, tubing, stack components - "recycled", as much as plastic is actually recycled - probably incinerated if we're looking at what happens nowadays... The used graphite felts may be able to be recovered or recycled - not sure. Used separators, again, possible to recycle. The main thing is, we don't know much about recycling of RFB stacks is - because not many of them have been built and actually reached end-of-life. They are, though, easy to take apart, which makes separating the constituent components very simple. And, for inorganic electrolytes, there are many established ways to recover the starting compounds, or to re-use in a new RFB system. This is an approach for vanadium RFB companies, some of which try to "lease" their electrolytes for periods of 20 years, because it effectively doesn't degrade (i.e., the vanadium isn't going anywhere).
I hope this helps, again, sorry for the delay! After the holidays/new year I will be much less busy (December was rough) and so I'll be able to answer more rapidly!
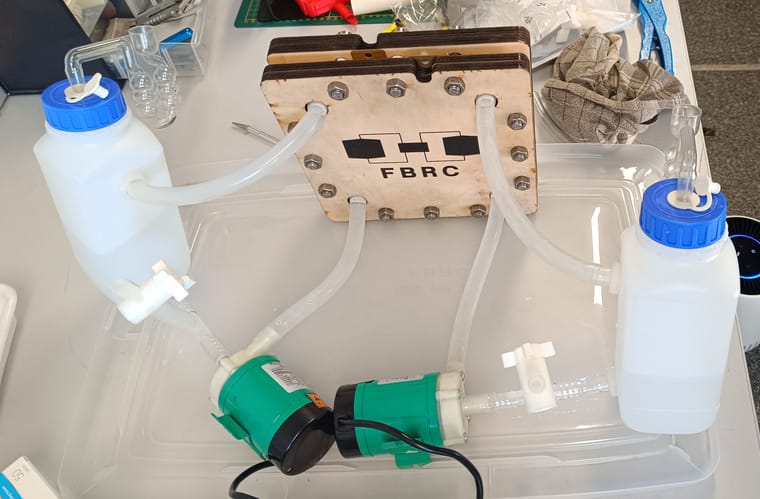
 ), so the connections aren't ideal but this time no kinks in the flow path. Note, I put these drain valves in, of course they are pointing the wrong way for now, will need to elevate the setup so they can point down in the future.


