Blog: czahl's build
-
Hi Guys,
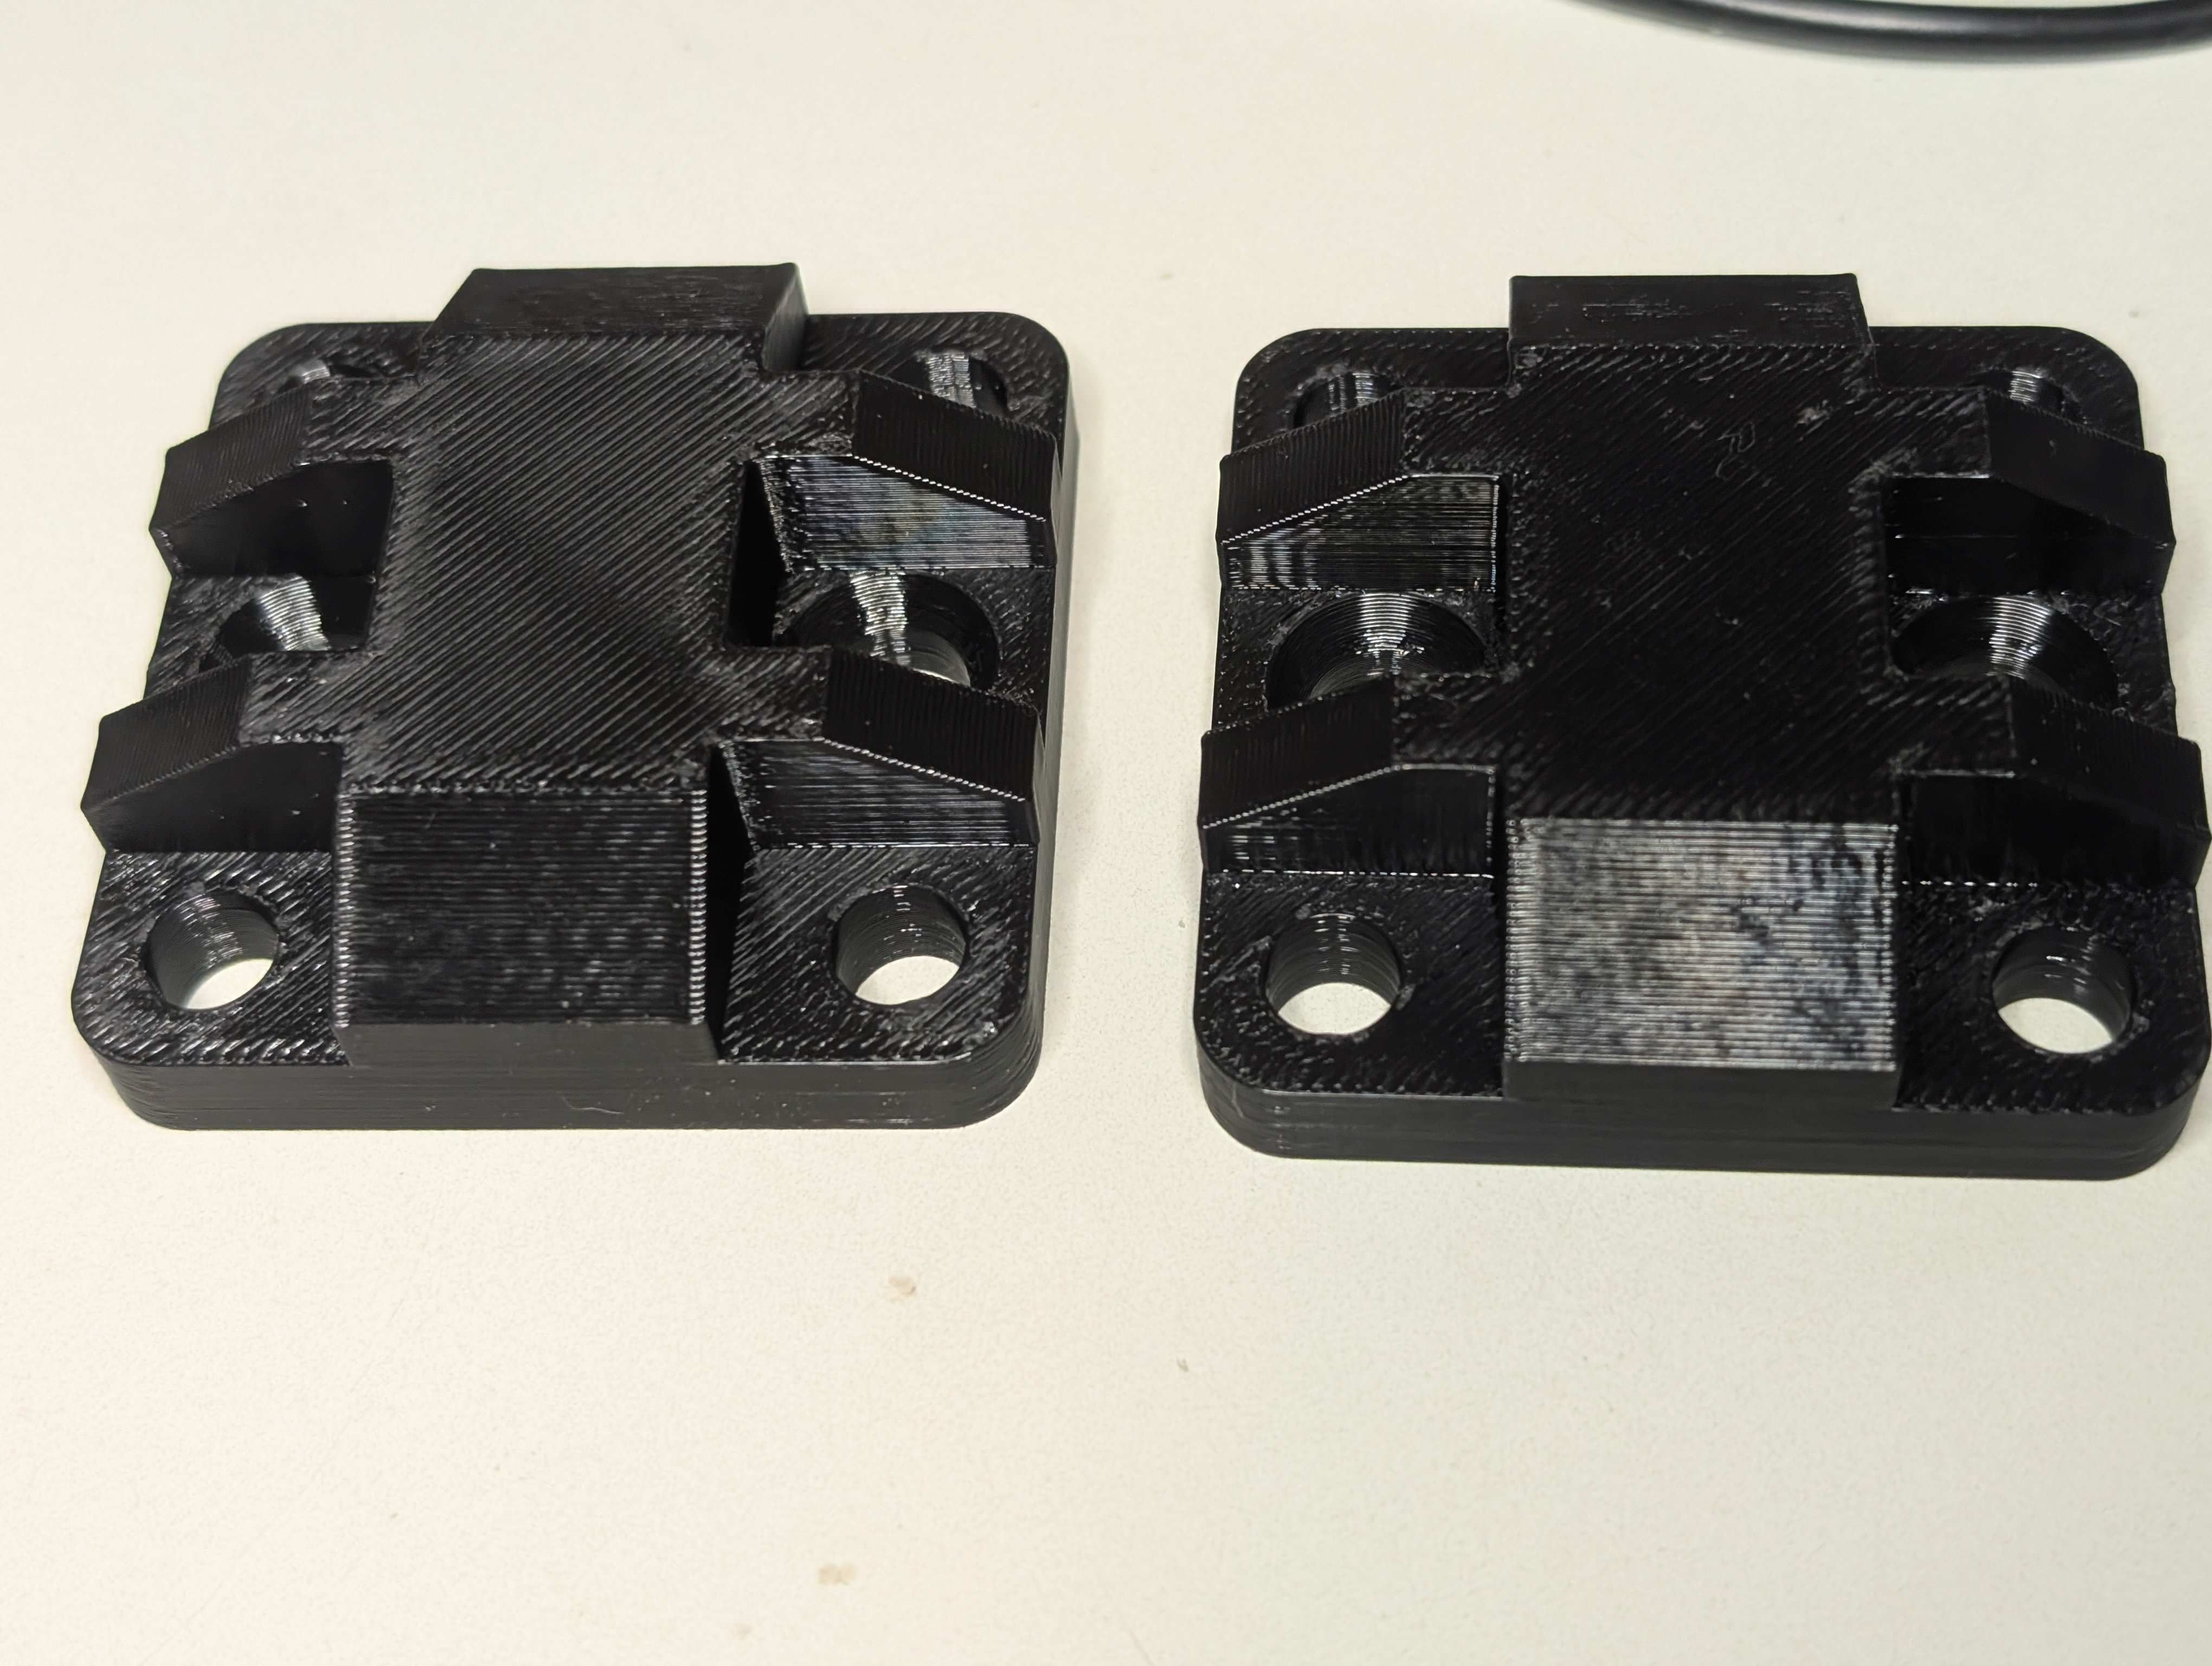
as promised I also want to document my journey on building the kit. Yesterday I started with the very simple endplates:
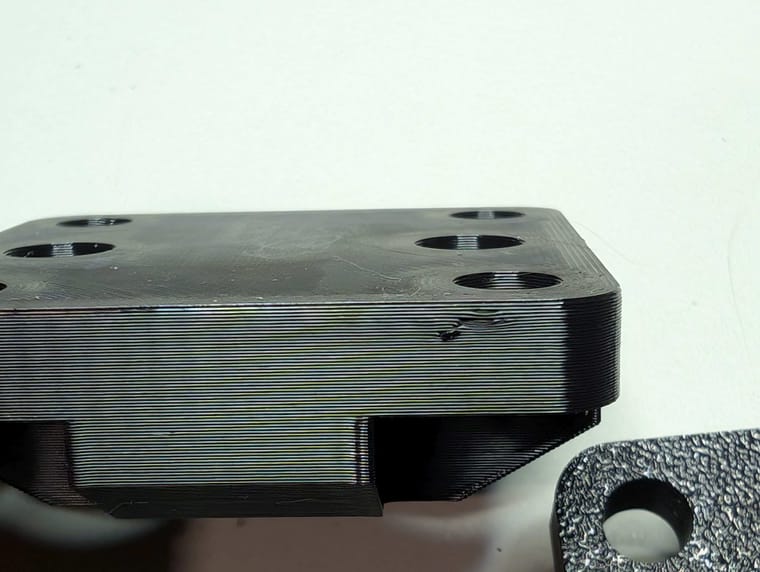
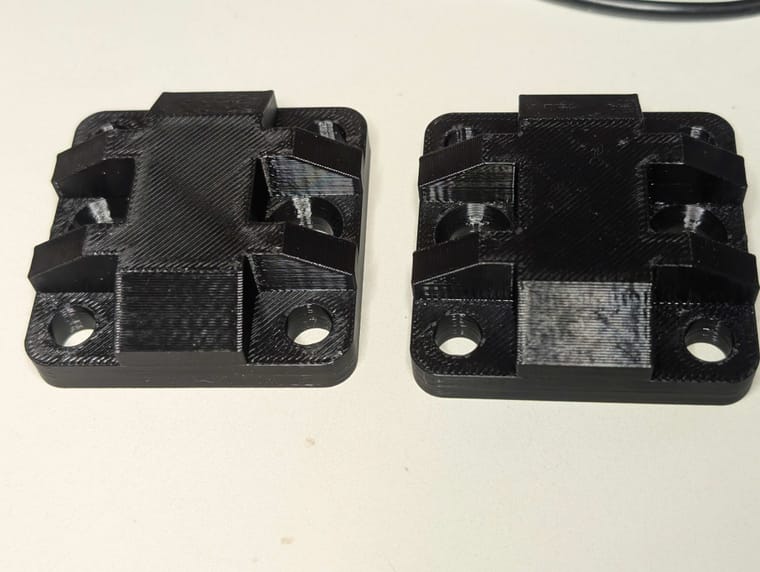 The right one was the first, printed with 15% infill, the left one with 60%, but still just 2 wall loops. Of course, you can feel the difference in the weight.
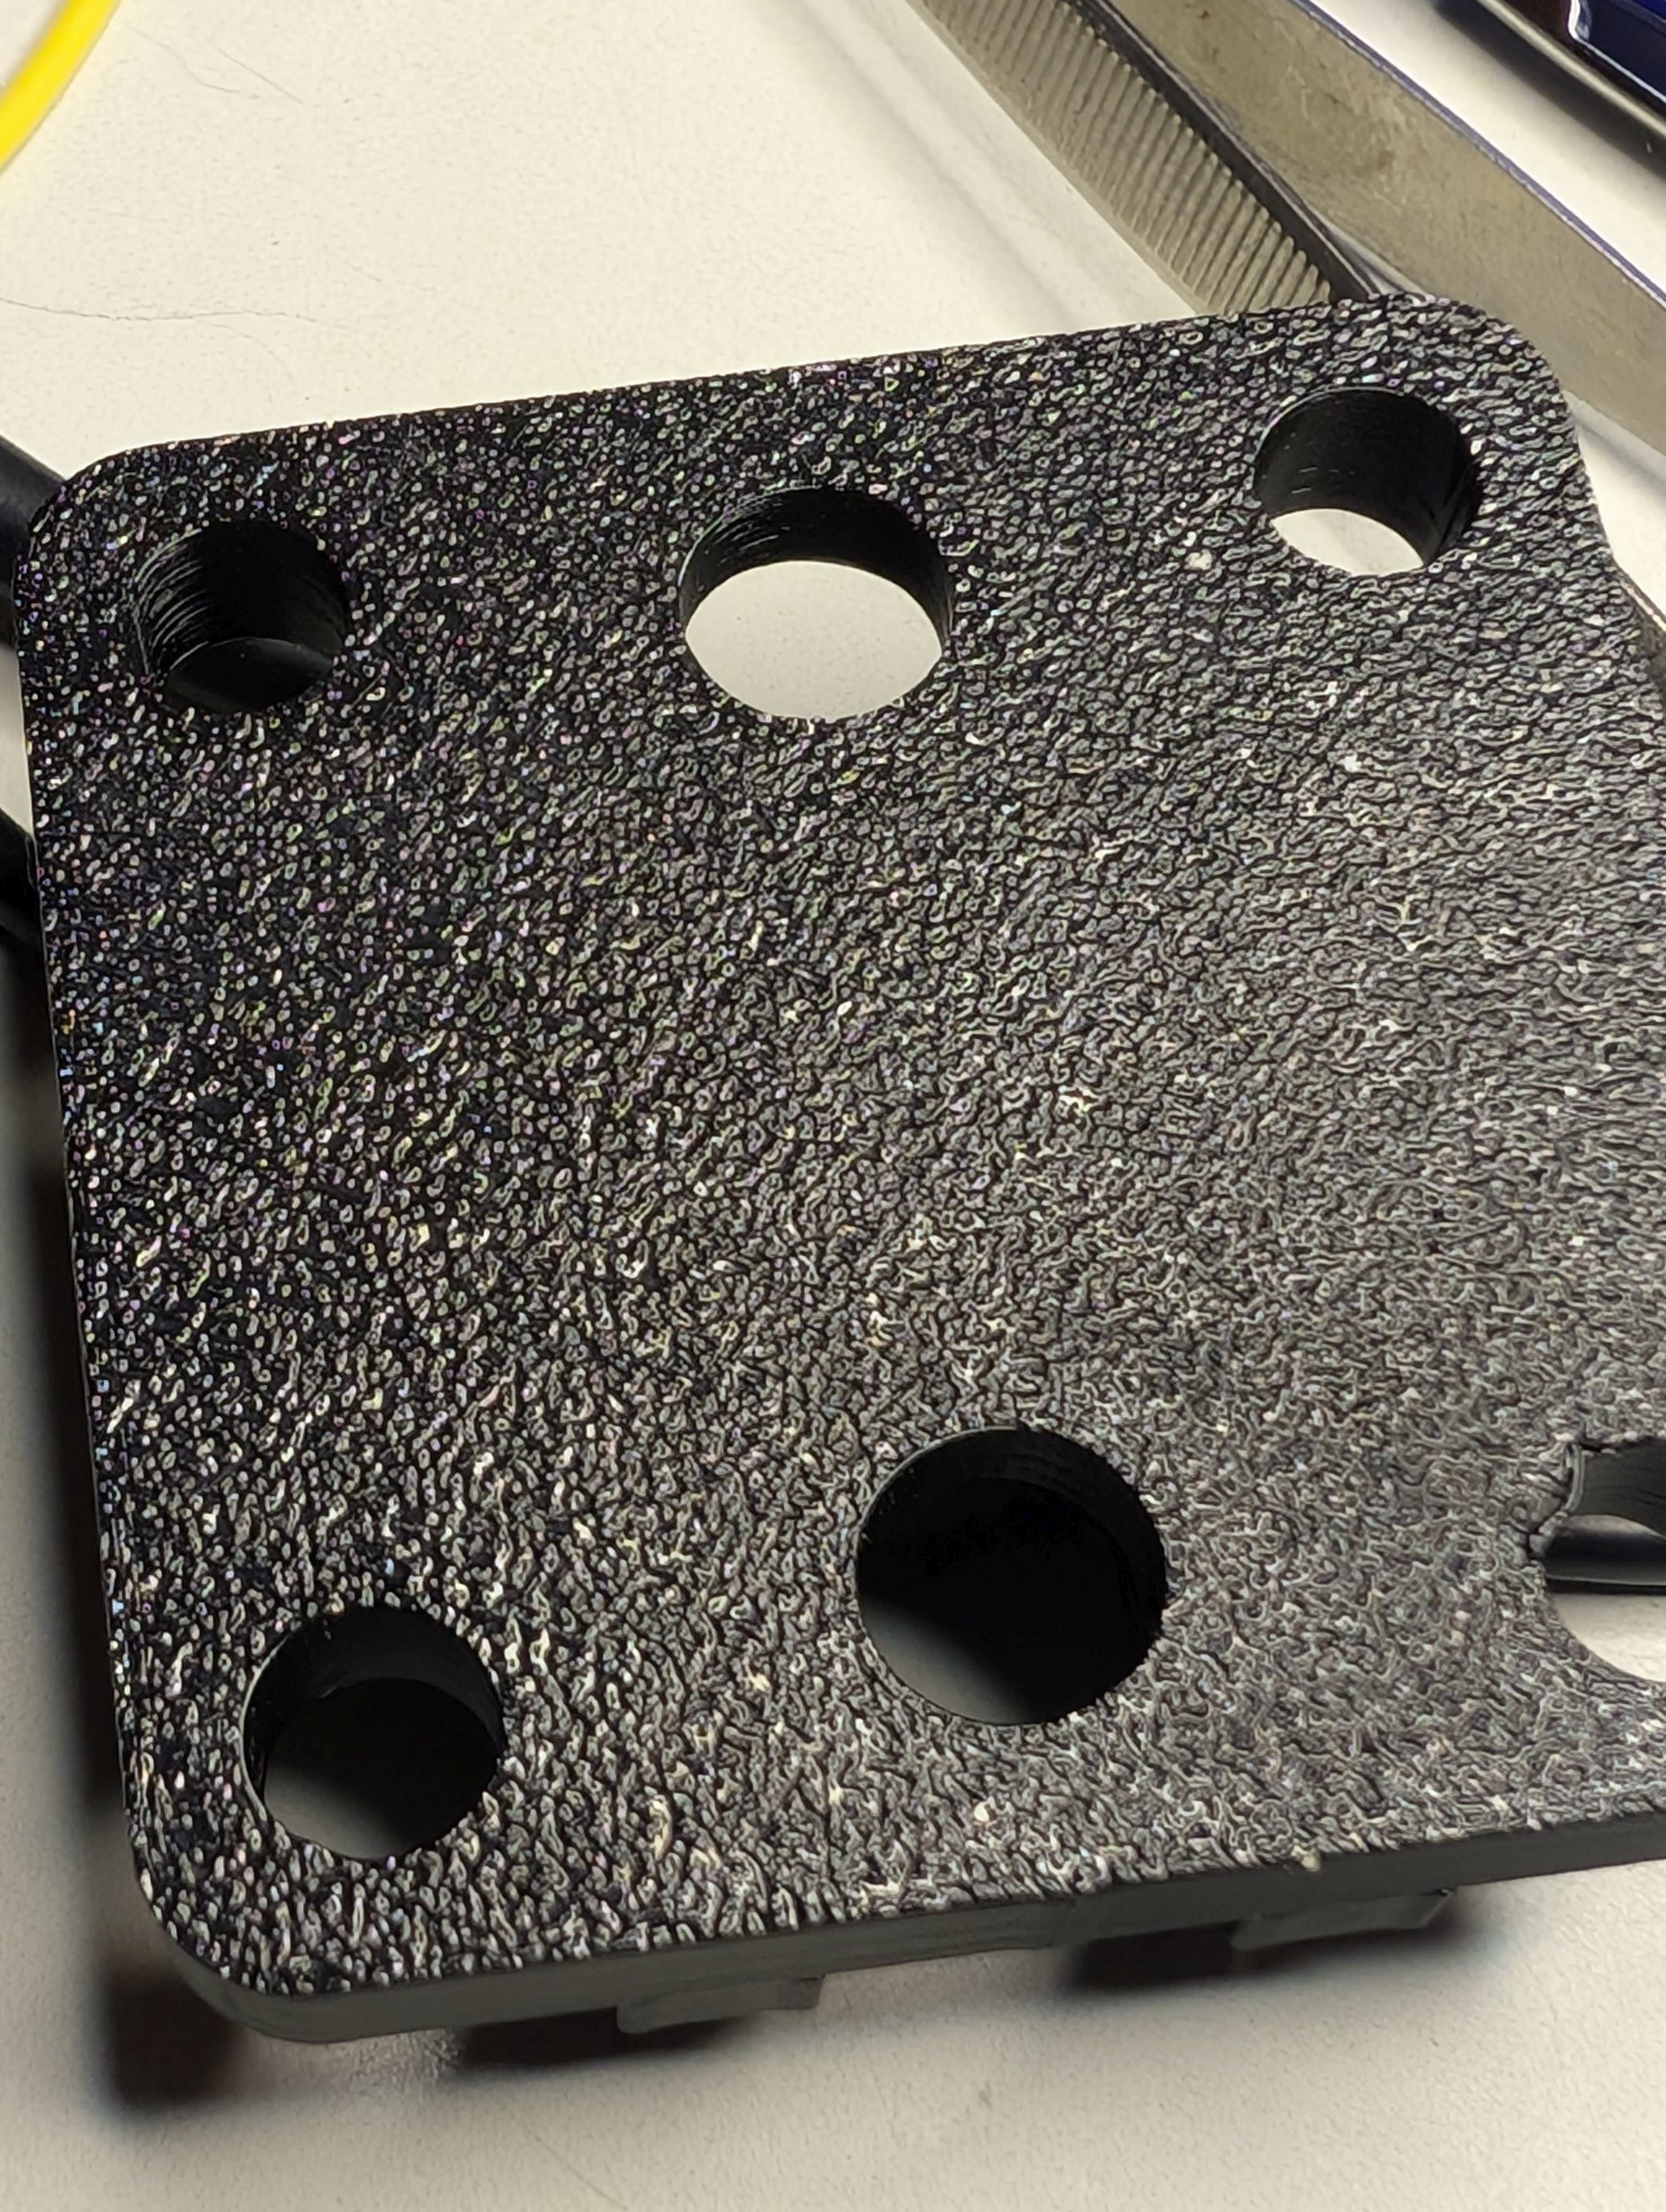
One problem I noticed was, that I had a PEI textured print plate only. Therefore the surfarce looks fine, but it might not be the best to seal the chamber.
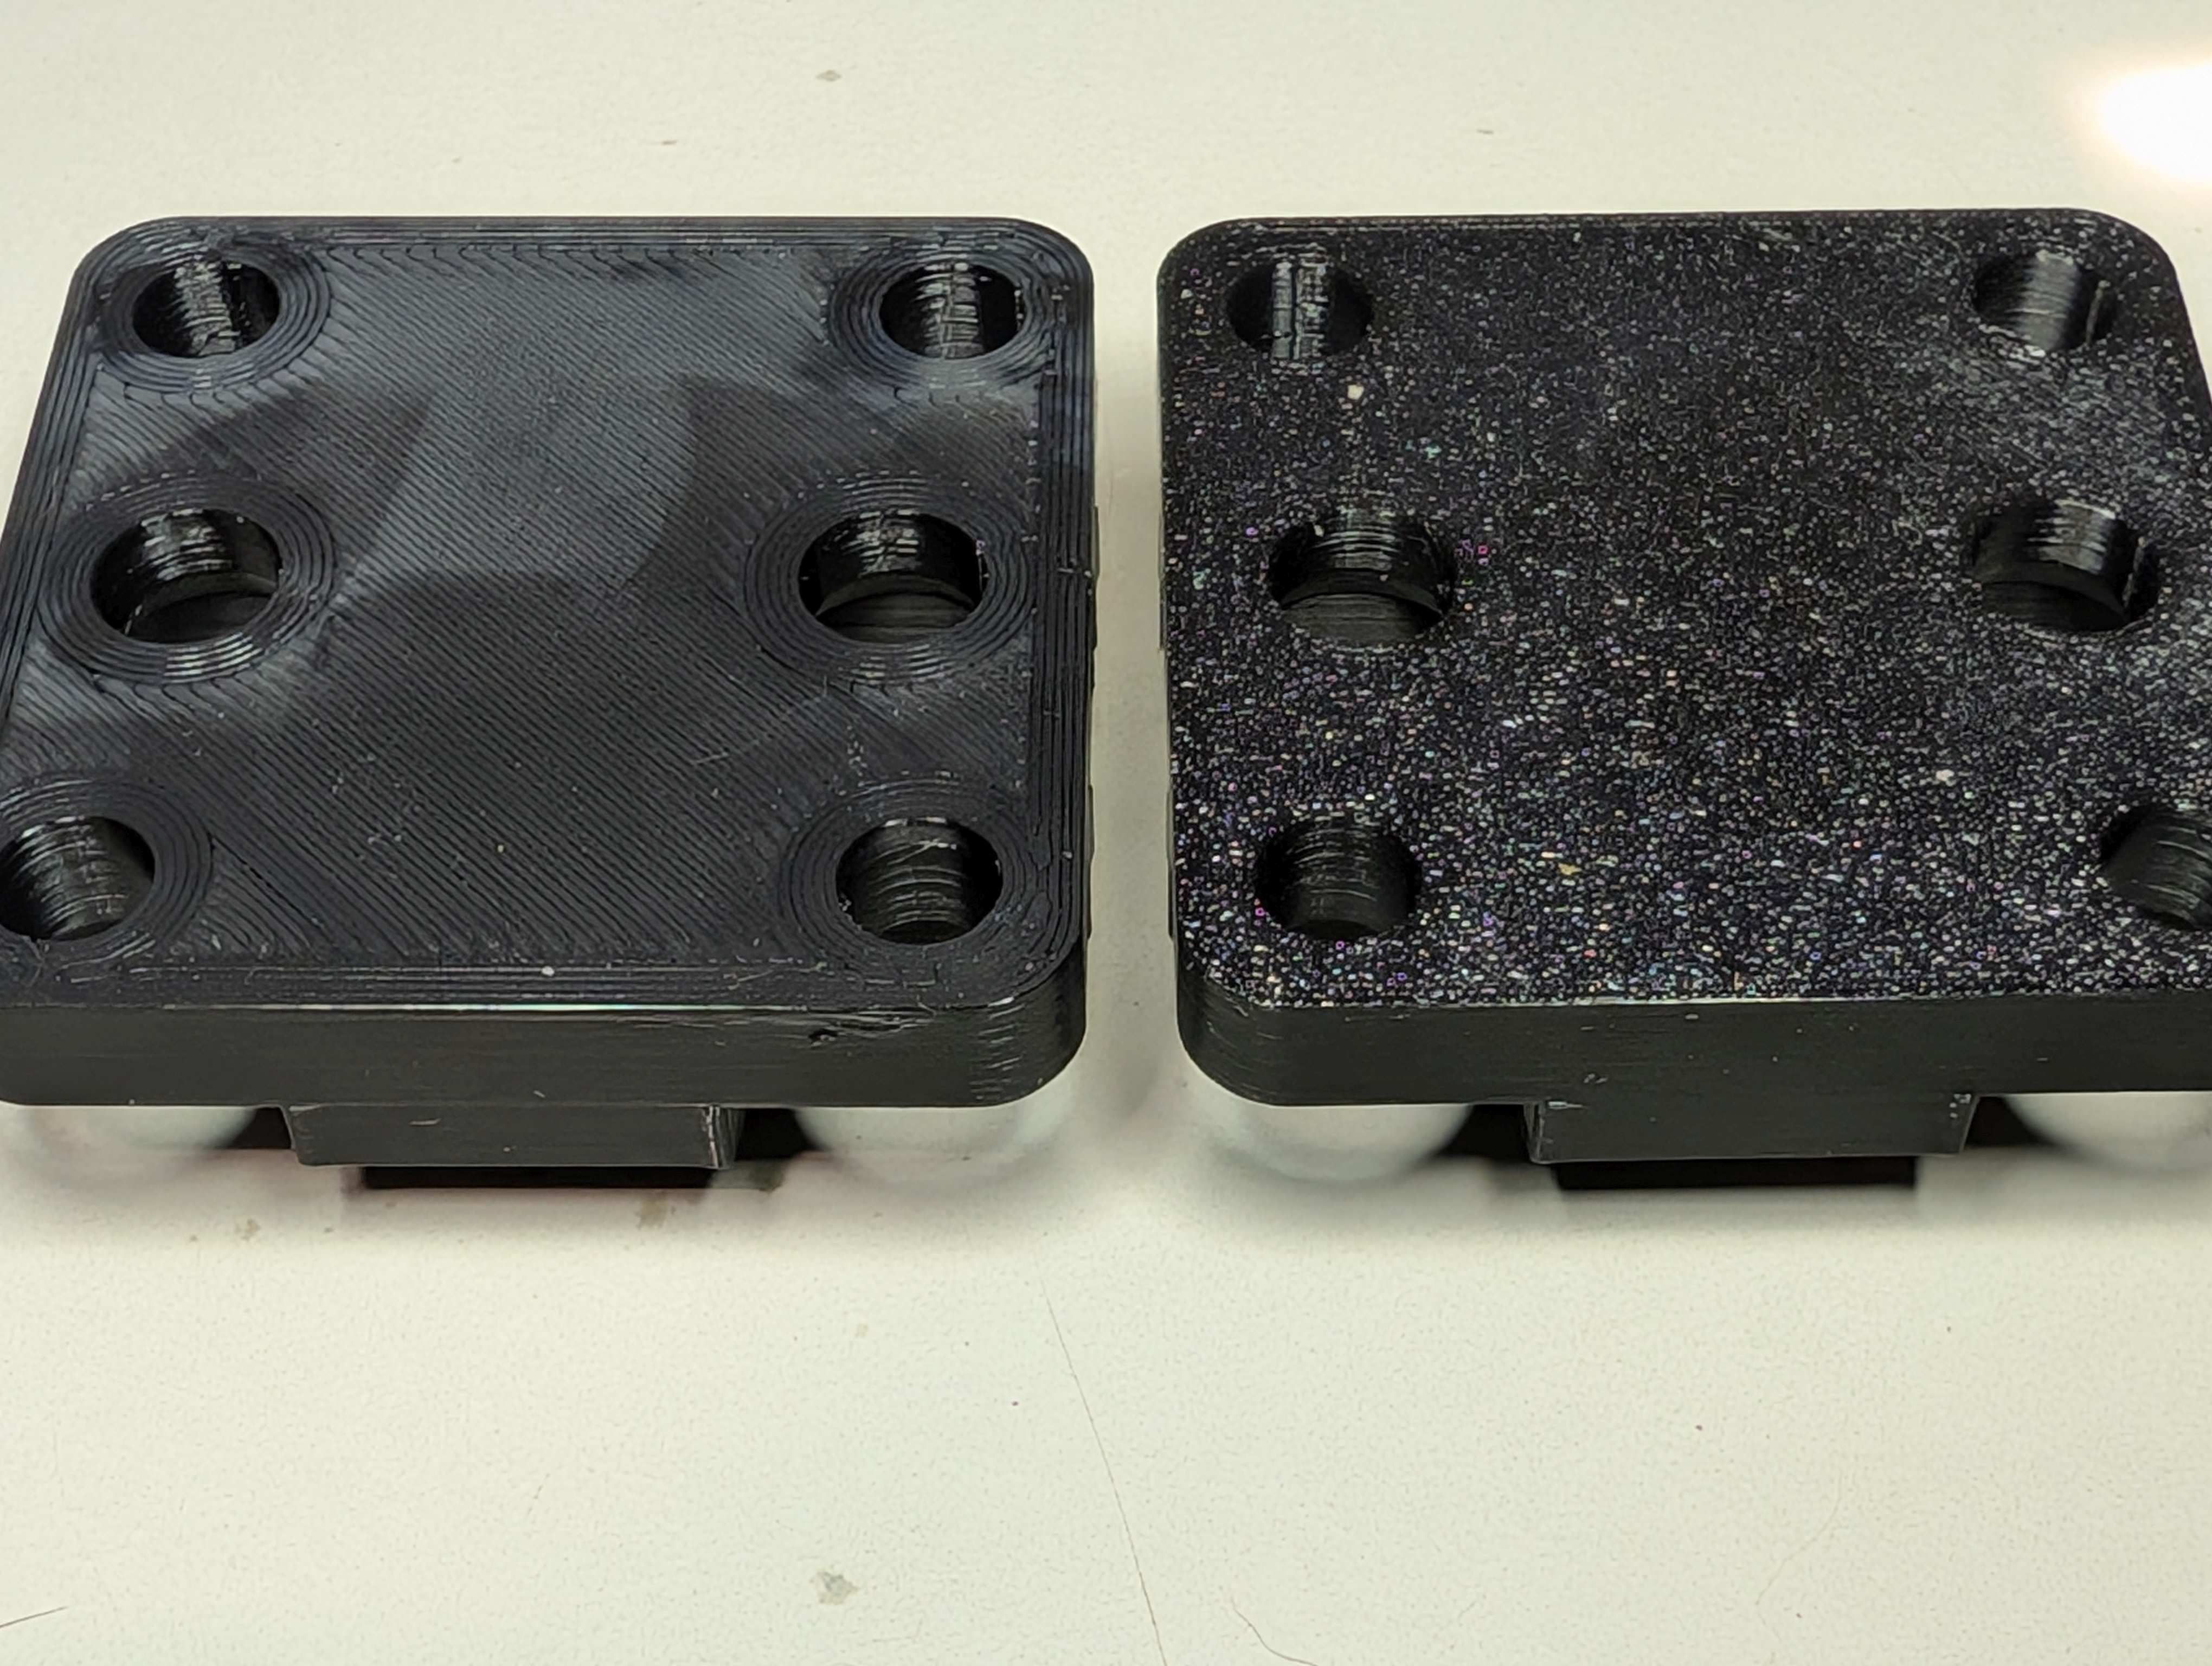
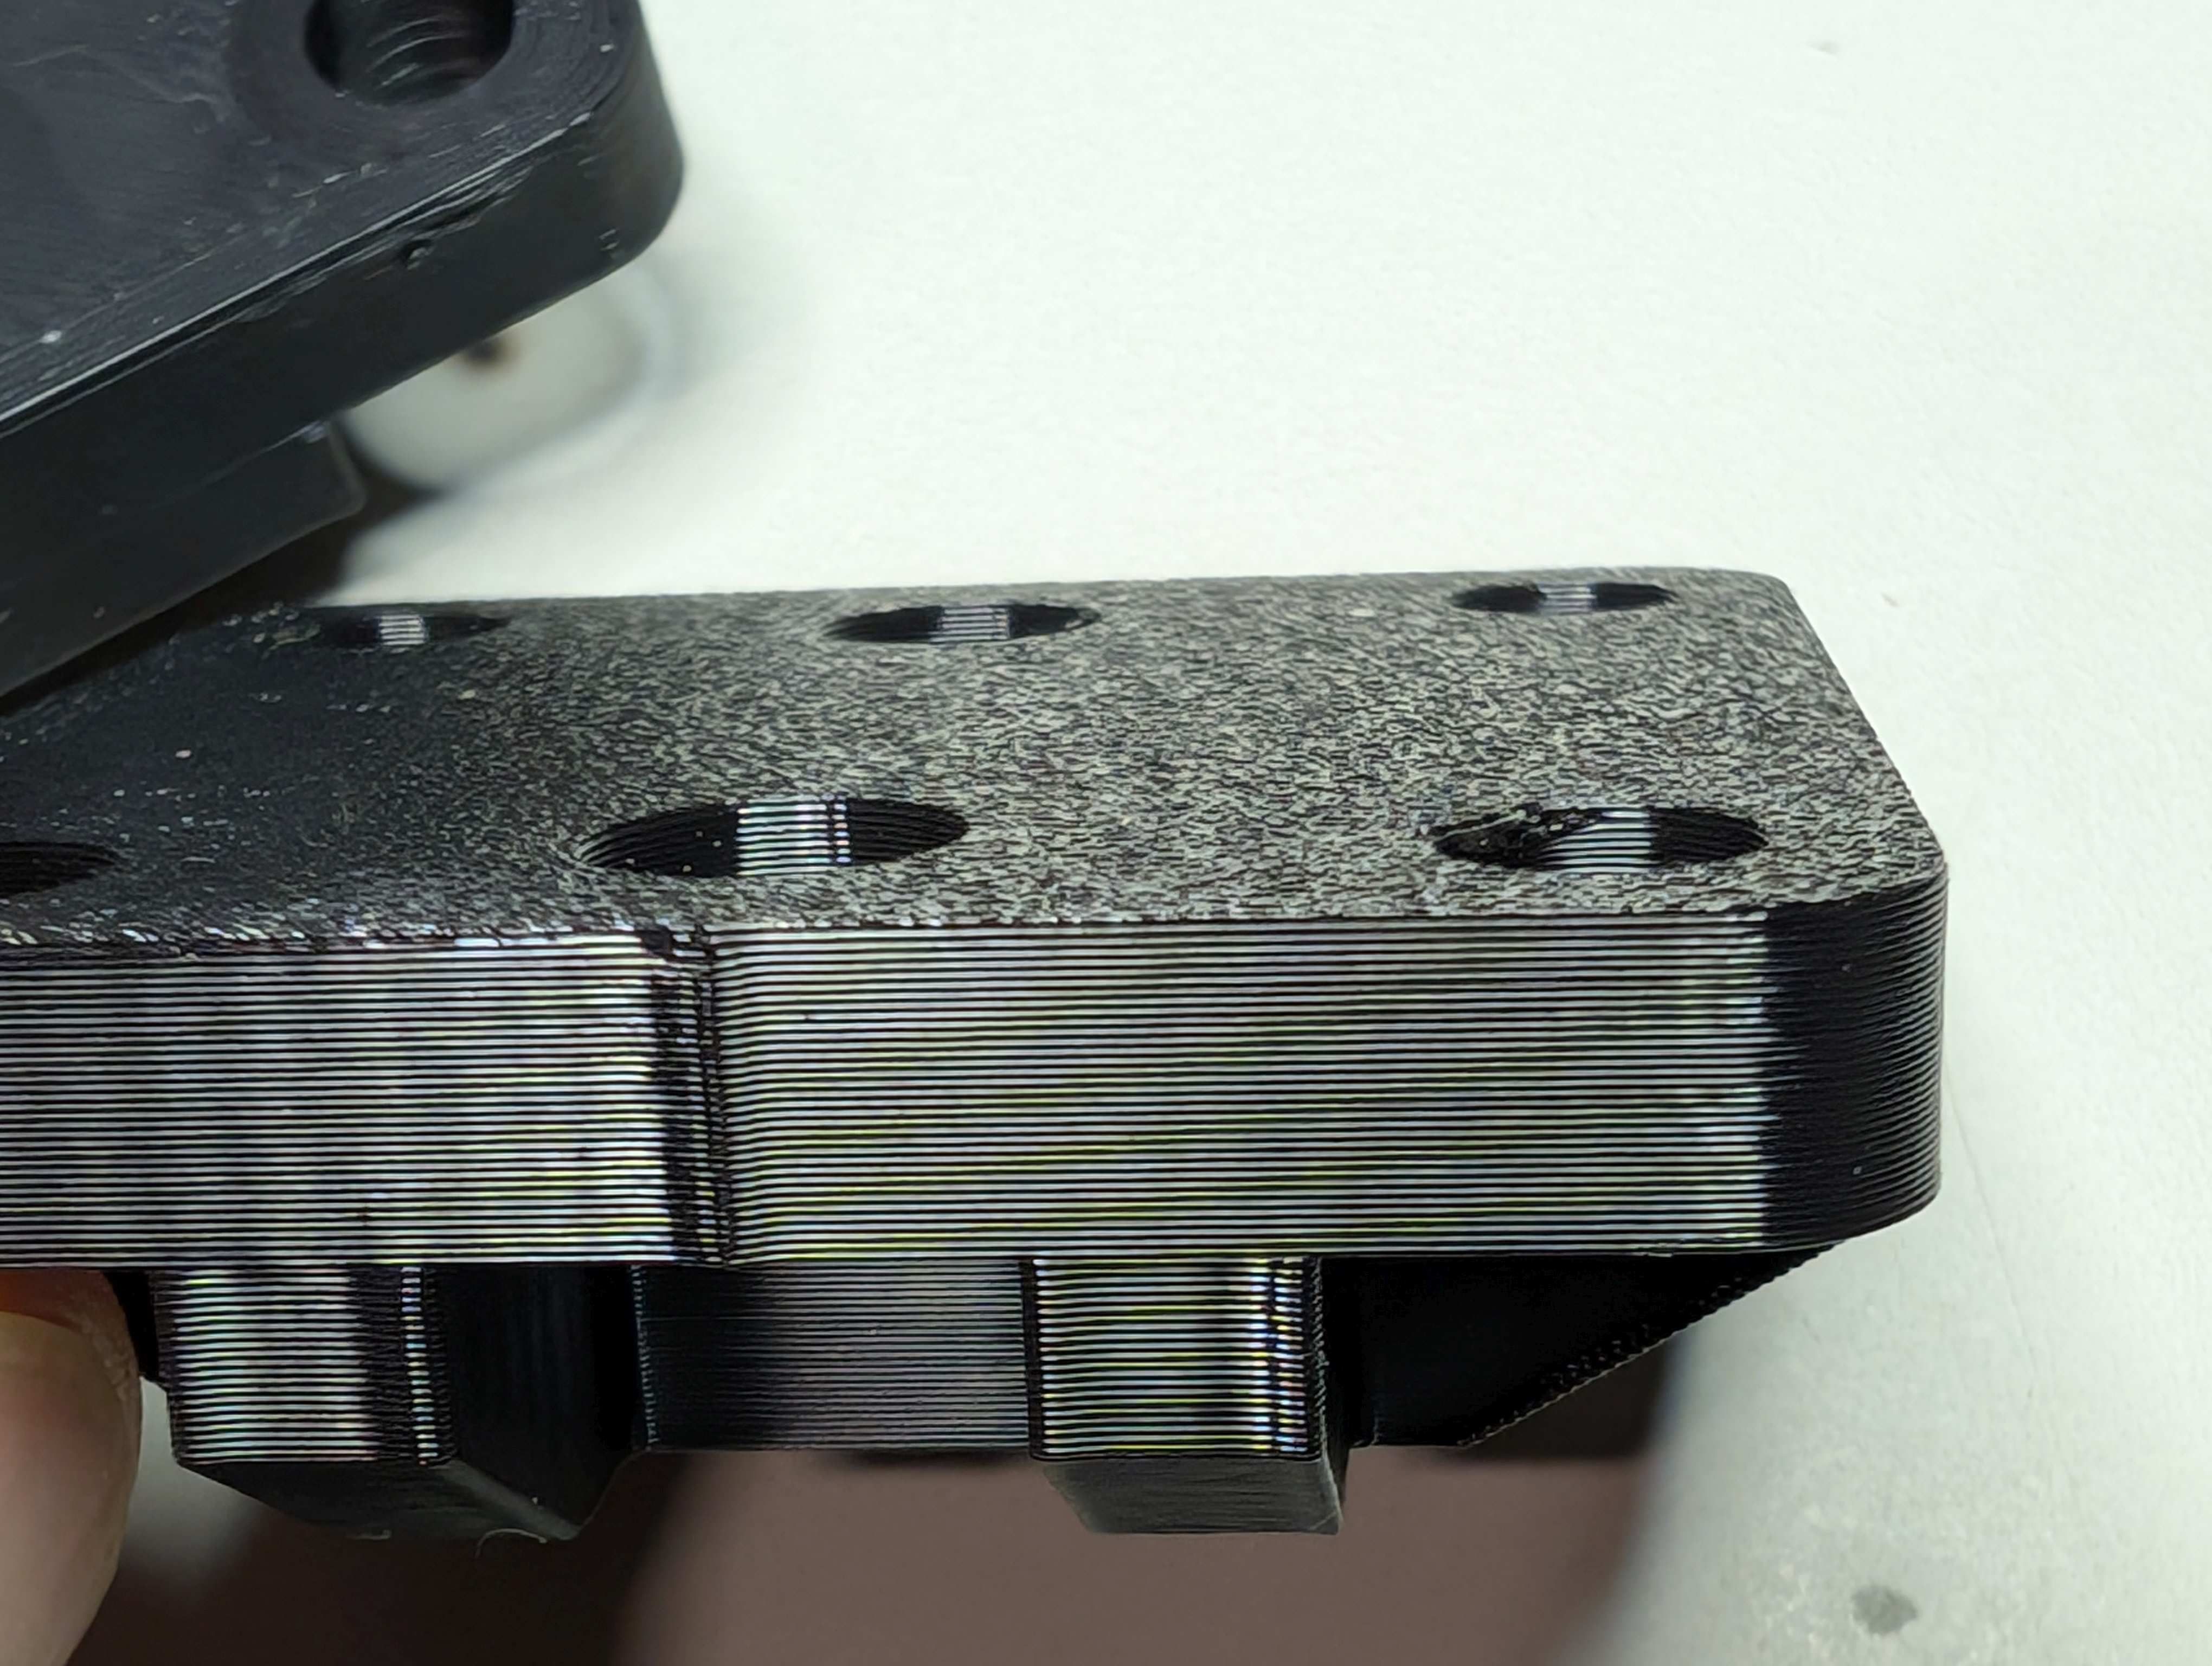
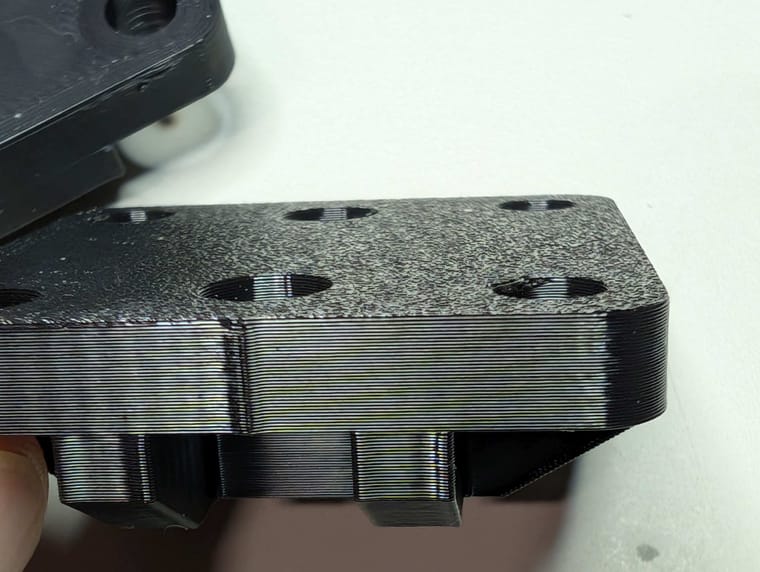
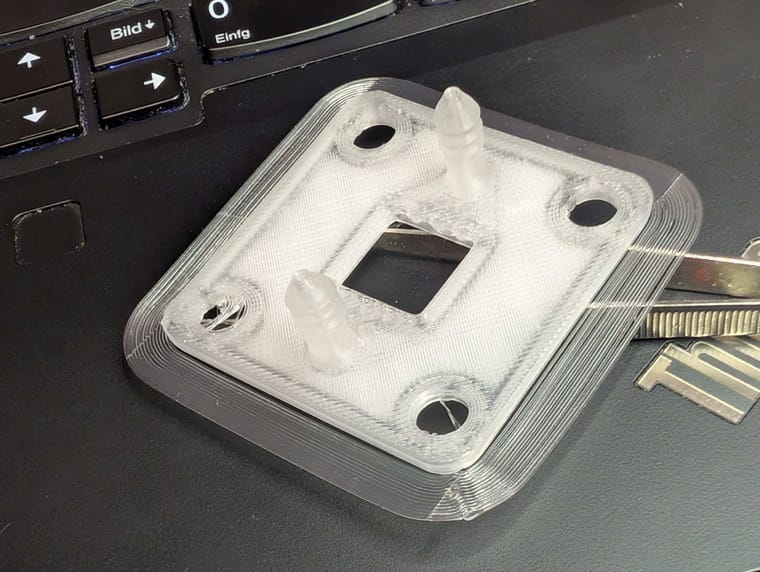
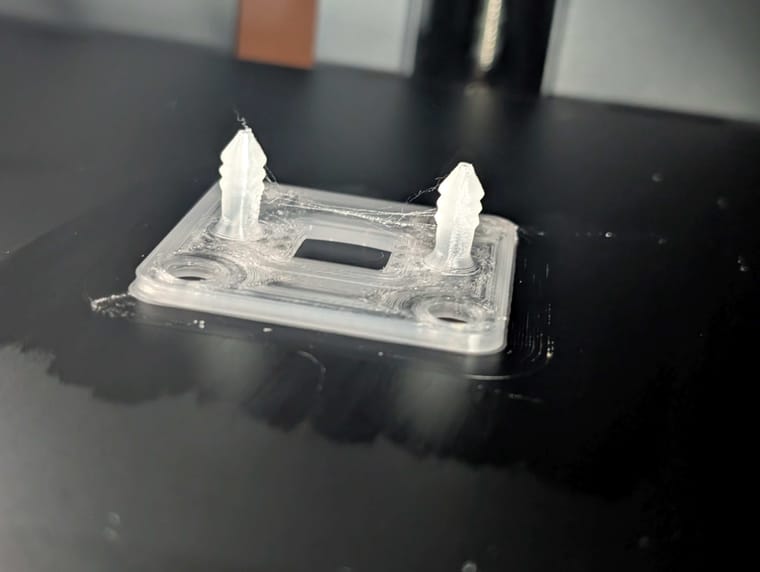
To solve this I ordered a flat "high temp" plate from Amazon, which arrived today. Of course, next print cycle was in the queue. This time with 5 wall loops:
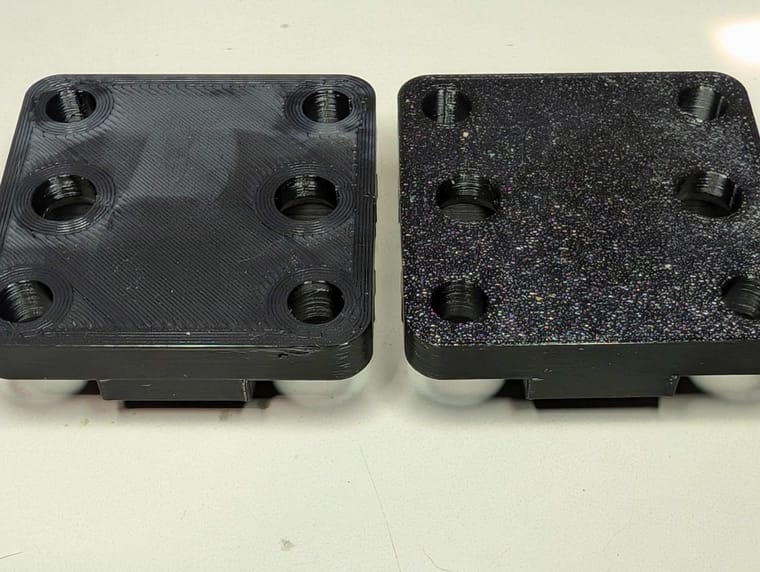
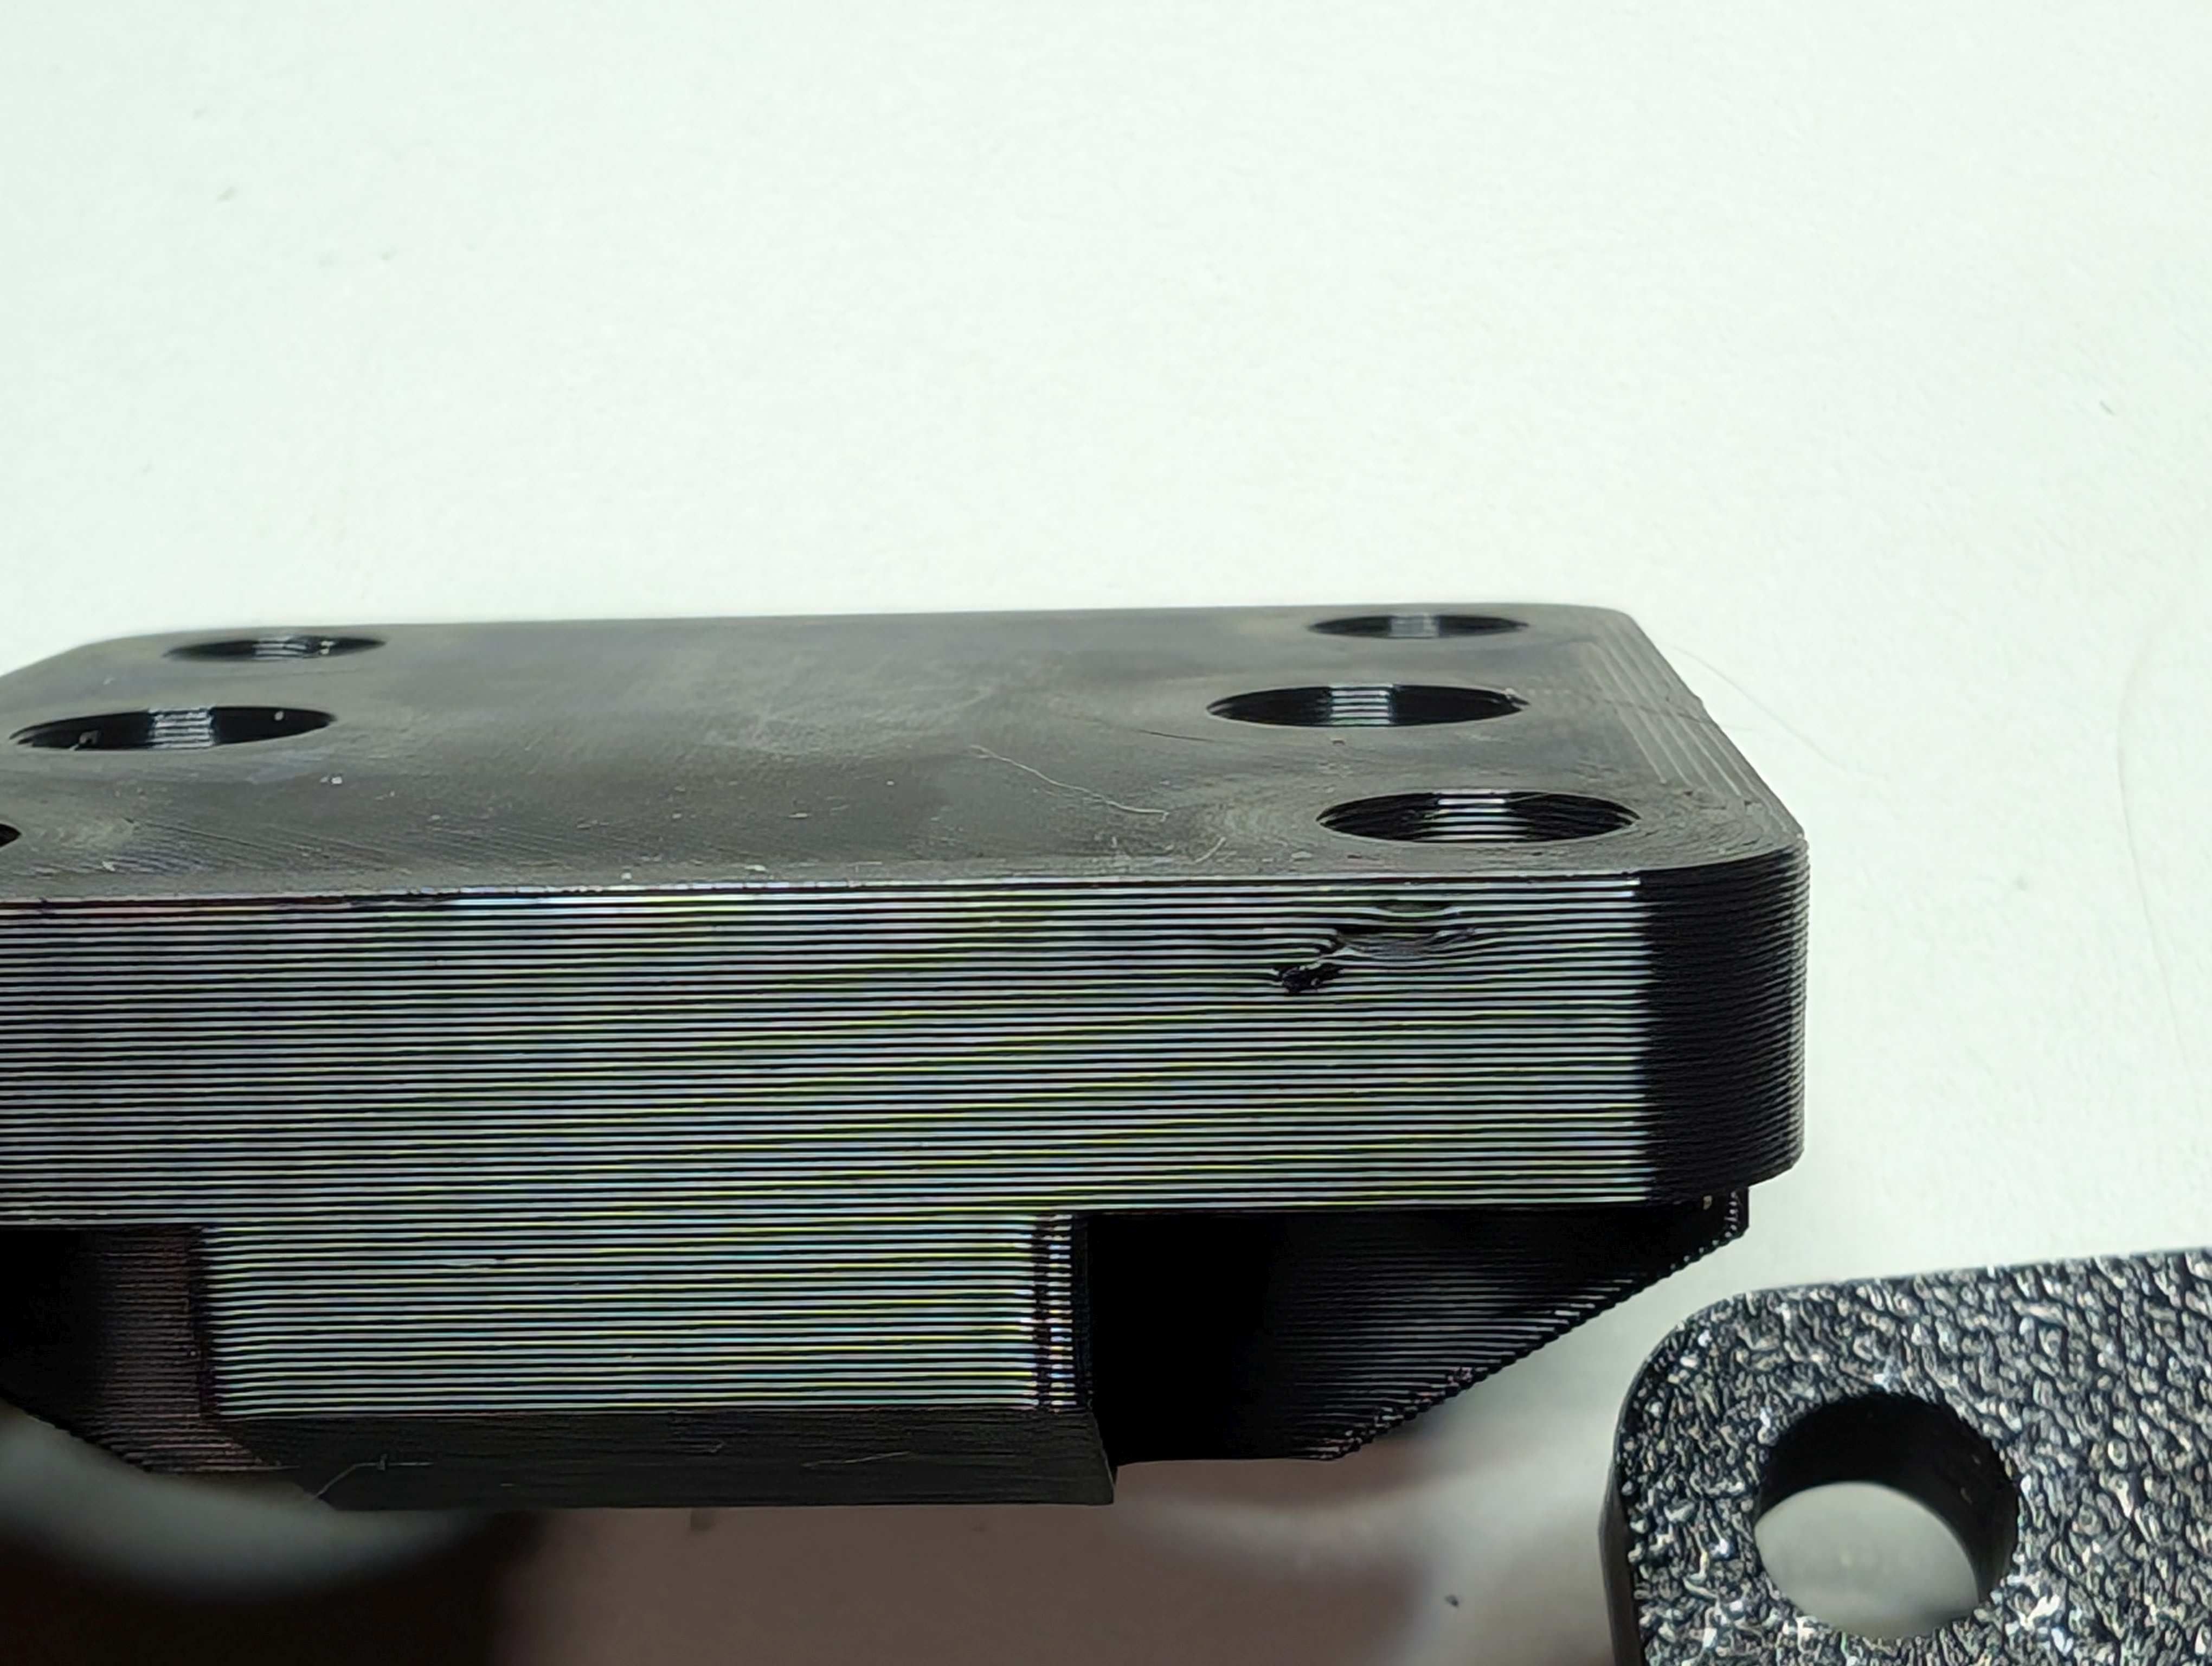
On the right the initial version, on the left the new one. You can see the difference immediately. Well, the picture still gives the impression that it is not flat, but it is:
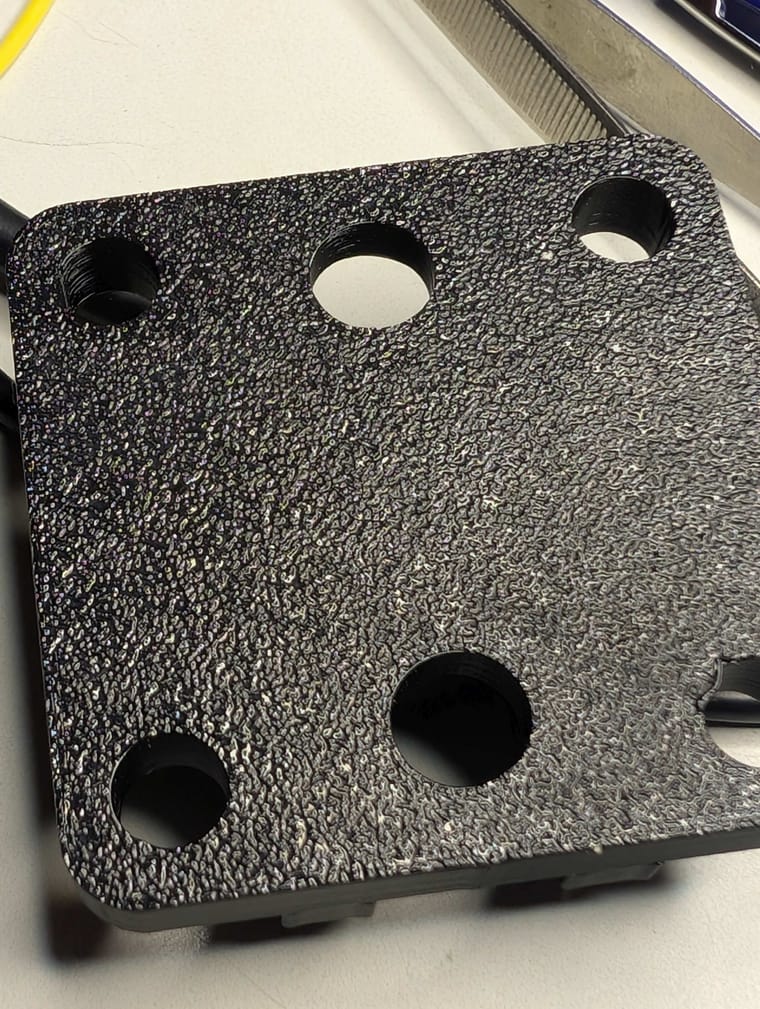
This is how the old one was looking:
BTW, I printed all of them in Geeetech PLTG on a Bmboo Lab P1S with AMS. The printing time for version with 15% infill was arround 25min, 48min for the version with 60%. Printed with 0.2mm layer height.
Looking forward to print my first parts in PP in the next days...
-
Congrats on your first pieces!!
I would not worry about the surgace finish too much since you will have the current collector doing the seal with the gasket. The 15% infill few perimeters might be problematic though. Good luck with the PP printing. Be ready to try out different tricks to get ot to stick to you surface.
-
-
Looks good! And yes good luck with polypropylene. Like sepi said, the current collector/graphite foil is doing the sealing, not the actual endplate surface, which shouldn't ever contact the electrolyte. I don't think the texture will play a large role.
-
End of last week I had my very first tries in PP printing. I used the same flat plate I used for the endplates. While looking quite good at the beginning, the part started to high warpings and got loose from the plate. Then the filament seems to be so "soft" that I got a jam close to the extruder and once in the Bambu AMS. In both cases I had to partly disable them to get the jam resolved.
At least I managed one instance by using the packing tape method:
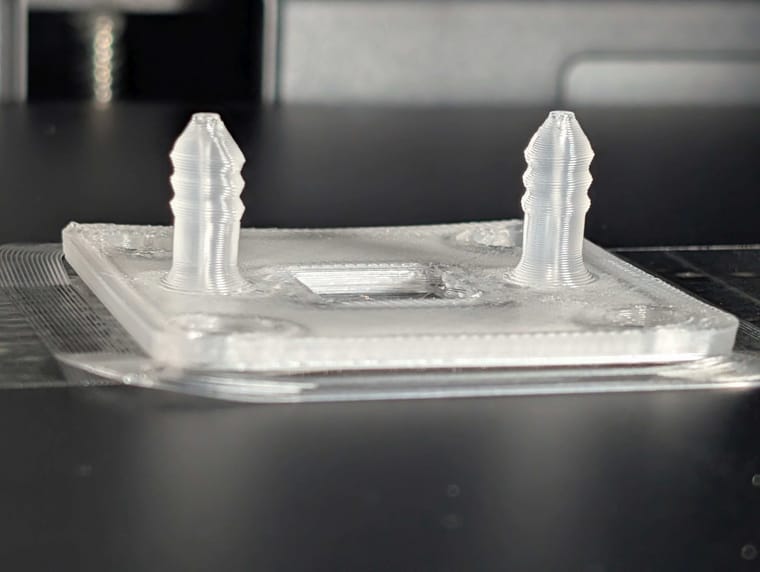
I decided to use only one stripe in the middle as I noticed a gap / overlap when using two side by side. Perhaps I should have used two additional ones on top / bottom to avoid the warping of the bim. At least with this tape I had no problem to lose the part from the surface.
While the result was looking promising, it has a big problem. It is leaky. I made a simple blow test while closing the outlet with my fingers. Still I could hear the air flow through the layers. Before going on with the PP printing of other parts, I will repeat the print while adjusting the infill pattern, layer height and flow parameter until the blow test is satisfying. I also have 2 other PP filaments to test and a special plate promissing to great for PP printing - let's see. -
End of last week I had my very first tries in PP printing. I used the same flat plate I used for the endplates. While looking quite good at the beginning, the part started to high warpings and got loose from the plate. Then the filament seems to be so "soft" that I got a jam close to the extruder and once in the Bambu AMS. In both cases I had to partly disable them to get the jam resolved.
At least I managed one instance by using the packing tape method:
I decided to use only one stripe in the middle as I noticed a gap / overlap when using two side by side. Perhaps I should have used two additional ones on top / bottom to avoid the warping of the bim. At least with this tape I had no problem to lose the part from the surface.
While the result was looking promising, it has a big problem. It is leaky. I made a simple blow test while closing the outlet with my fingers. Still I could hear the air flow through the layers. Before going on with the PP printing of other parts, I will repeat the print while adjusting the infill pattern, layer height and flow parameter until the blow test is satisfying. I also have 2 other PP filaments to test and a special plate promissing to great for PP printing - let's see.@czahl good work! Getting PP to seal is not very hard, but you must do a few things. For these prints it's important to
- Increase your number of horizontal shells to a large number (6-10). Vertical shells should be at least 5-6.
- Increase the extrusion multiplier slightly (1.05)
- Use outer and inner brims to make sure the inside part doesn't warp either.
- Increase the infill/perimeters overlap value to a higher value (I used 45-50%).
- Print at 100% infill.
- Use PP tape or use a surface specifically made for PP printing (I use the Prusa PP surface).
I attach my prusa slicer configuration bundle in case that's useful.
FF_config_bundle.txt -
I'm using tesa transparent packing tape and the print sticks so well to the tape that often I can't remove the tape from the print afterwards. The solution is to just rub the glue off and consider the tape part of the print ^^. We'll see about the results once I have the pump.
@czahl how did you seal the manifolds with your fingers? That sound tough to get right.
-
I'm using tesa transparent packing tape and the print sticks so well to the tape that often I can't remove the tape from the print afterwards. The solution is to just rub the glue off and consider the tape part of the print ^^. We'll see about the results once I have the pump.
@czahl how did you seal the manifolds with your fingers? That sound tough to get right.
@sepi I'm also using tasa packing tape, but without any glue:
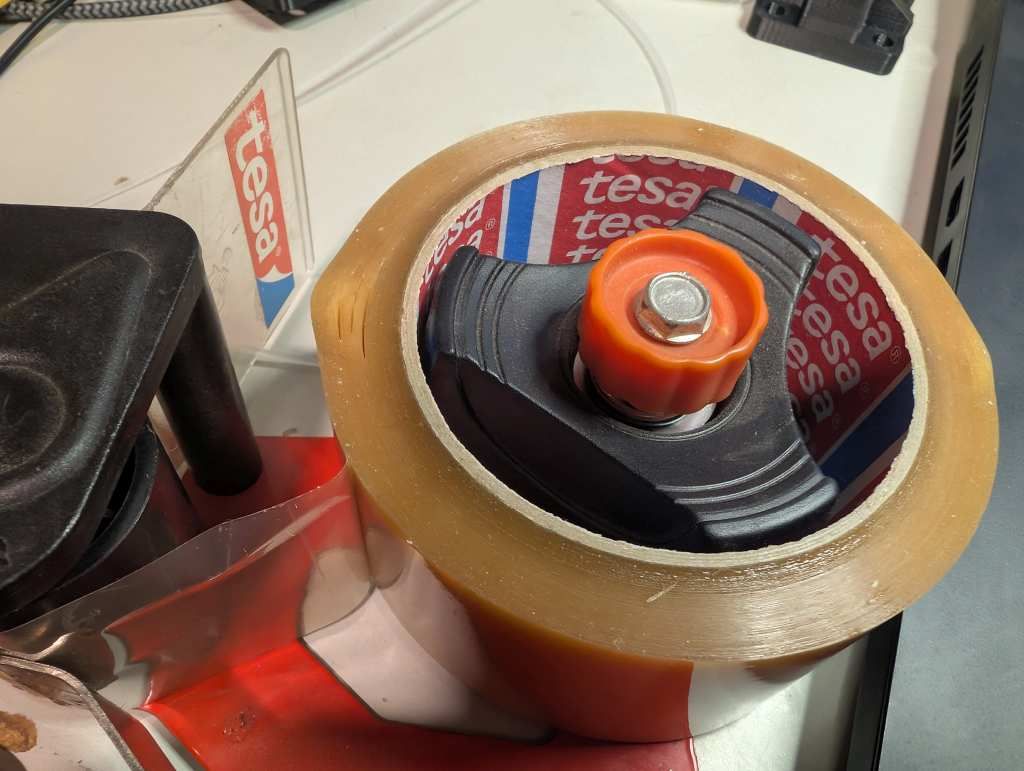
I'm printing with "Formfutura Centaur PP" filament. Once I lifted the corner of the brim I had no issues to pull the print from the tape.
This is how I did my blow tests:
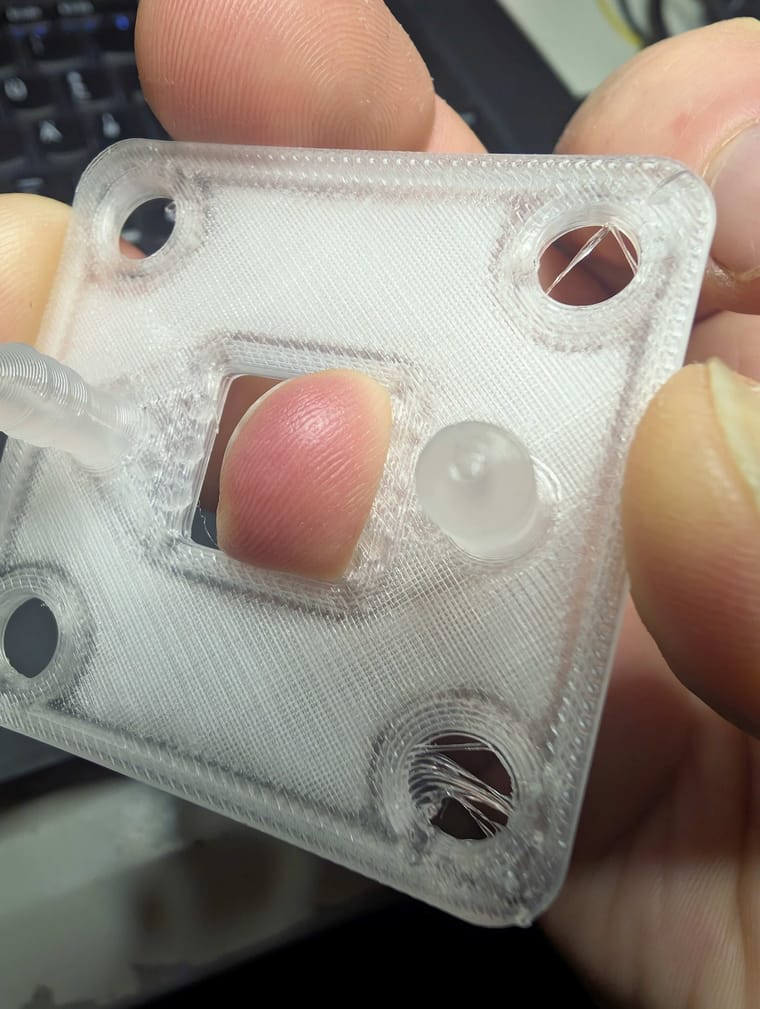
When I just blow into the "nozzle" I can hear the sound of the escaping air. While gently pressing the small finger against the outlet I noticed the change in the sound as the air was escaping somewhere else. -
@czahl good work! Getting PP to seal is not very hard, but you must do a few things. For these prints it's important to
- Increase your number of horizontal shells to a large number (6-10). Vertical shells should be at least 5-6.
- Increase the extrusion multiplier slightly (1.05)
- Use outer and inner brims to make sure the inside part doesn't warp either.
- Increase the infill/perimeters overlap value to a higher value (I used 45-50%).
- Print at 100% infill.
- Use PP tape or use a surface specifically made for PP printing (I use the Prusa PP surface).
I attach my prusa slicer configuration bundle in case that's useful.
FF_config_bundle.txt@danielfp248 Thanks for the tips. Yesterday I made some new tests and now I have one which seems to be close. When doing my blow test I was able to seal the outlet with my finger, so that I did not hear / feel any air escaping any more.
With the three pieces of tape put side by side the brim also stick very good to the tape, I have not seen any warping. I also used the ironing so that the top surface also feels much more flat now. Just the filament is getting me crazy. After one print I always have a bigger piece at the end of the extruder, so that it will not support for the next prints. -
@sepi I'm also using tasa packing tape, but without any glue:
I'm printing with "Formfutura Centaur PP" filament. Once I lifted the corner of the brim I had no issues to pull the print from the tape.
This is how I did my blow tests:
When I just blow into the "nozzle" I can hear the sound of the escaping air. While gently pressing the small finger against the outlet I noticed the change in the sound as the air was escaping somewhere else.@czahl This is how I've done the sealing too. You have to press quite hard with your finger. Good thing is that the print must be good for this to work, otherwise it just won't seal, either because the edges are warped or because it escapes through the top or bottom.
-
@czahl Nice to hear that you got it tight. I also like the arrangement of your tape pieces. I suspect that my flow-frames might not seal because of the gap between the tapes, just moving the gap to the side totally makes sense.
@sepi Yeah, I made the mistake in my very first print and observed a small line on the surface due to the overlap / gap between the tapes. Then I realized that the tape width is approx. the width of the part, therefore I rearranged the tape to use just one in the middle. But the brims beside the tapes were not fasten enough to plate, therefore I added one above and one below...
BTW. after my approx. 10th print the tape is damaged now, so I need to replace it.
-
@czahl It's really strange how easily you can remove the print from that tape. It's handy though. I tried adding some mineral oil to facilitate removal but that didn't help. Maybe next time I'll also try some glue stick.
@sepi I have seem some YouTube videos where they showed the same, the tape was bonding too good to the filament, or even melted with it. I have no clue why this is not the case with me. Either it is based on the filament or on the printing parameter. What I used (mix of recommendations from @danielfp248 and the Magigoo Manual:
- bed temp of 80° for the first layer, 35!° for the others
- printing with 250° for the first layer, 240° for the others.
- my best results so far are with a variable layer height, between 0.05 to 0.28 mm
Later today I will try to print with BASF Ultrafuse PP filament and hopefully tomorrow with the kit from PPprint.
-
Yesterday I made a new test with the BASF Ultrafuse PP filament - and it behaves totally different. When keeping all the parameters as before, it was loosen from the tape after some layers. I also noticed massive warping, the brims were also warped up.
Next I used the print profile from BASF. It uses a much higher temperature (which is not in line with the datasheet), but the result was the same. In addition, the packing tape melted so I had to remove it.
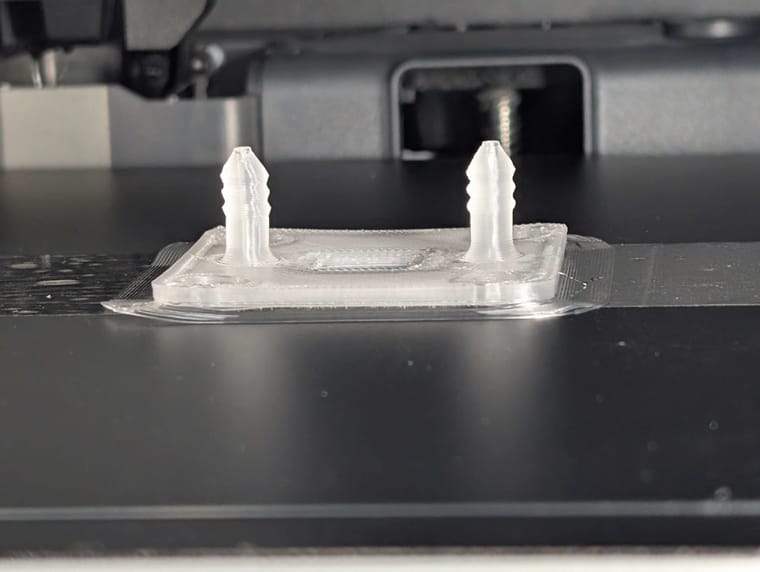
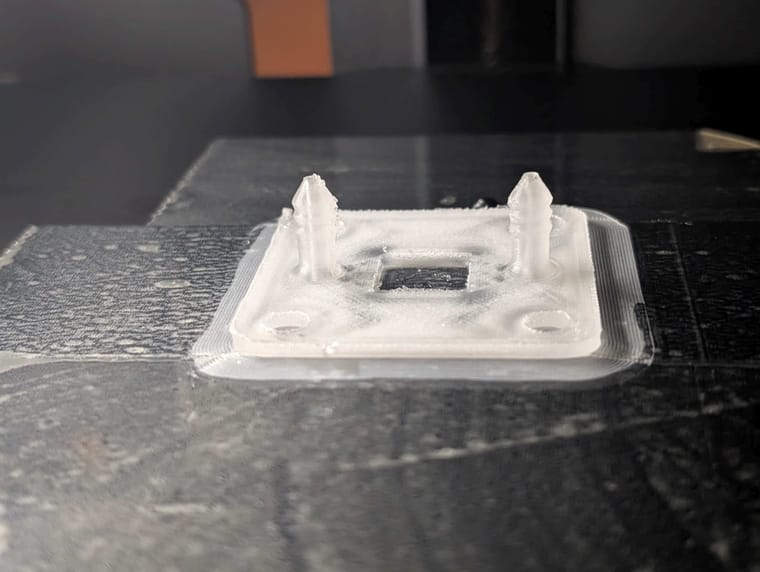
Next I used a this film of MAGIGOO PP adhesive glue, which gives a good result:
It has some stringing (might be because of the high temp) but fastened to the printing plate quiet well. Removal after cooling down was also easy. Unfortunately, the flow was too much so that the hole in the port was solid. I need to tune the parameters further or to use the new update from @kirk where the inner diameter is increased from 2 to 3mm. -
@czahl interesting findings. I guess I need to buy some of that expensive magigoo. About those "clogged" holes, why not just drill them open a bit?
@sepi said in Blog: czahl's build:
About those "clogged" holes, why not just drill them open a bit?
This might be possible. If the port is clogged until the bottom, it will get tricky, specially when reaching the bottom. But I will give it also a try this evening...
-
Yesterday I made a new test with the BASF Ultrafuse PP filament - and it behaves totally different. When keeping all the parameters as before, it was loosen from the tape after some layers. I also noticed massive warping, the brims were also warped up.
Next I used the print profile from BASF. It uses a much higher temperature (which is not in line with the datasheet), but the result was the same. In addition, the packing tape melted so I had to remove it.
Next I used a this film of MAGIGOO PP adhesive glue, which gives a good result:
It has some stringing (might be because of the high temp) but fastened to the printing plate quiet well. Removal after cooling down was also easy. Unfortunately, the flow was too much so that the hole in the port was solid. I need to tune the parameters further or to use the new update from @kirk where the inner diameter is increased from 2 to 3mm.@czahl said in Blog: czahl's build:
the new update from @kirk where the inner diameter is increased from 2 to 3mm.
Also good catch, @danielfp248 has tested this already and it results in smoother flow/less pressure drop in the system without introducing new leakage it appears.
Hello! It looks like you're interested in this conversation, but you don't have an account yet.
Getting fed up of having to scroll through the same posts each visit? When you register for an account, you'll always come back to exactly where you were before, and choose to be notified of new replies (either via email, or push notification). You'll also be able to save bookmarks and upvote posts to show your appreciation to other community members.
With your input, this post could be even better 💗
Register Login