@danielfp248 Thanks for the hint this is the reason. In the version referenced in the paper, the firmware is extended to support the 4 current ranges.
C
czahl
@czahl
Posts
-
My build (very slowly progressing) -
My build (very slowly progressing)@danielfp248 said in My build (very slowly progressing):
We have never updated the firmware, we use the same one as the original mystat paper
Are we talking about the same mystat repo? Again in my understanding this paper reflects the PCB from PcbWay, und this has the 4 reed relais (on top of the picture) for the 4 current ranges. In the main.c only the original 3 are handled.
Somewhere there is a mismatch, or am I'm looking into the wrong repo?
-
New member introduction thread!Hi Andre, welcome in the club. Your target sounds very well to me - but I do not have a wind turbine (beside my DIY test drives). We are having very little wind conditions in our area, so it does not make too much sense.
Enjoy the trip.
-
My build (very slowly progressing) -
Blog: czahl's build@kirk One question regarding the gasket. The upper surface of the printed parts is never as flat as the bottom, which is driven by the plate surface. Isn't it possible to wipe a small layer of usual silicone on it and let it dry? Optionally by immediately sticking the next part to assemble to it (e.g. membrane frame onto the flow frame)?
-
MyStat PCBs for free@danielfp248 @sepi oh damned, now I have awaken some expectations

@danielfp248 @kirk you as maintainer of this forum, any idea how to exchange PN or email addresses?
-
New member introduction thread!@tserong said in New member introduction thread!:
I've had three+ years experience at my home with Redflow ZCells hooked up to Victron inverter/charger gear,
Hi Tim, highly welcome. This is exactly what I plan to do with my Victron setup

-
MyStat PCBs for freeYou can pretty easily get them on digikey or similar
yeah, I usually order at RS; there will by some way to get them.
What's your equipment and experience with soldering?
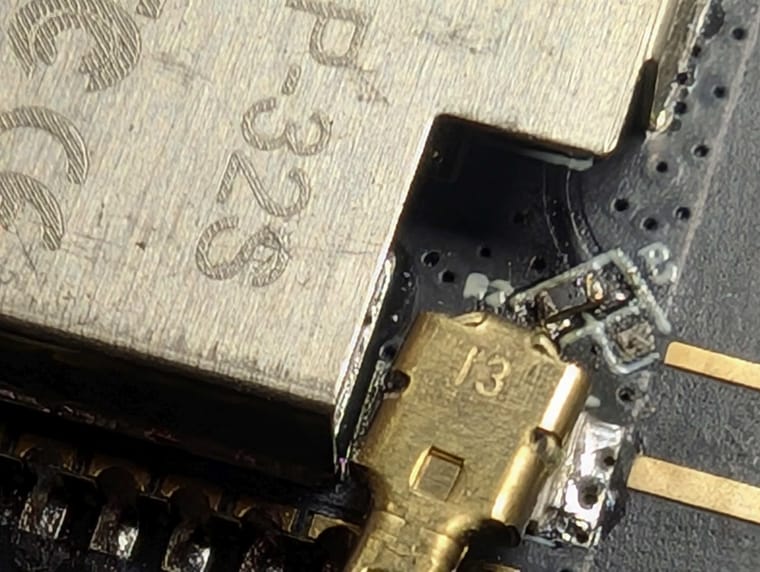
I'm using an ERSA i-CON and Weller 1010 since "some" years. Soldering of small footprints will be done by soldering below a Bresser 3D Microscope. I do not have a reflow oven, so the BGA will be a challenge but should be possible with my hot-air soldering station as well.
When you solder this by hand some pieces have really short contact points, so it is very hard to figure our where you have shorts.
You are absolutely right you have to be very careful. But I also manged to turn the 0-ohm resistor on the ESP32-cam to use the external antenna.
-
MyStat PCBs for free@sepi
 I have no clue how easy it is to source all the components, but would be a nice exercise. If you still have one left over...
 -
My build (very slowly progressing)@sepi Good idea, I was also thinking to use a ESP32 with micropython - makes prototyping much easier and if you like you can easily add a simple web UI.
-
Blog: czahl's buildPrinting the larger parts gives the impression that I'm almost done, but there is still a lot work to do...

I'm still waiting for the silicone foil, should arrive next week. BTW, has anyone tried to "mill" the silicone foil and graphite foil? I'm thinking to put it below a 2-3mm wood plate and use my OpenBuilds CNC router for it, wither with an engraving tool or a 4mm endmill... -
Towards a working system@quinnale said in Towards a working system:
I cheated and moved the cell the lab I work in for leak testing while I seek time to explore pumps. My PLA flow frames leaked, moving on from that.
Your cell looks quiet good. Damned that it is leaking. I guess this is the most critical test what we are all afraid of. But it has to be done, otherwise we will have the chaos later on. Good luck with your PP prints, it is really a "fun" ...
I've also been using imperial hardware (1/4-20 bolts), which the holes are slightly undersized for. Not big issues, just consequences of my choices.
One option is to use the FreeCAD source and adjust the diameters accordingly.
-
Blog: czahl's build@sepi said in Blog: czahl's build:
About those "clogged" holes, why not just drill them open a bit?
This might be possible. If the port is clogged until the bottom, it will get tricky, specially when reaching the bottom. But I will give it also a try this evening...
-
Blog: czahl's buildYesterday I made a new test with the BASF Ultrafuse PP filament - and it behaves totally different. When keeping all the parameters as before, it was loosen from the tape after some layers. I also noticed massive warping, the brims were also warped up.
Next I used the print profile from BASF. It uses a much higher temperature (which is not in line with the datasheet), but the result was the same. In addition, the packing tape melted so I had to remove it.
Next I used a this film of MAGIGOO PP adhesive glue, which gives a good result:
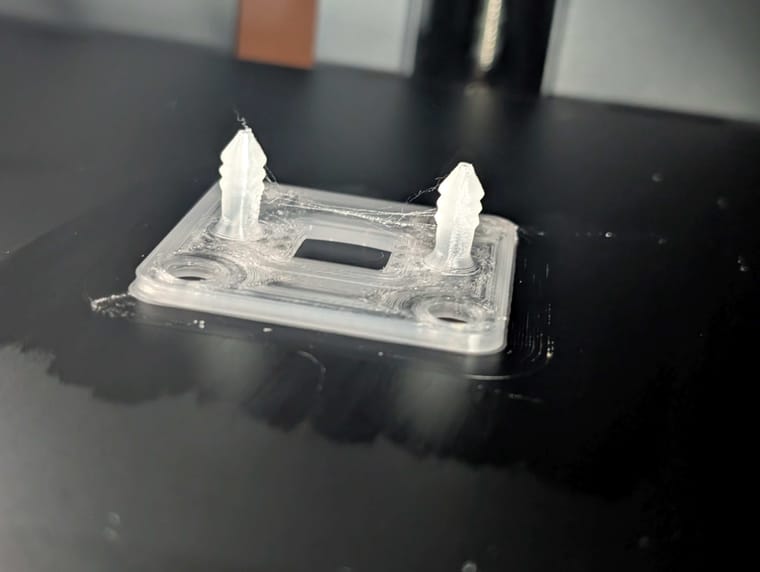
It has some stringing (might be because of the high temp) but fastened to the printing plate quiet well. Removal after cooling down was also easy. Unfortunately, the flow was too much so that the hole in the port was solid. I need to tune the parameters further or to use the new update from @kirk where the inner diameter is increased from 2 to 3mm. -
Blog: czahl's build@sepi I have seem some YouTube videos where they showed the same, the tape was bonding too good to the filament, or even melted with it. I have no clue why this is not the case with me. Either it is based on the filament or on the printing parameter. What I used (mix of recommendations from @danielfp248 and the Magigoo Manual:
- bed temp of 80° for the first layer, 35!° for the others
- printing with 250° for the first layer, 240° for the others.
- my best results so far are with a variable layer height, between 0.05 to 0.28 mm
Later today I will try to print with BASF Ultrafuse PP filament and hopefully tomorrow with the kit from PPprint.
-
My build (very slowly progressing)@sepi said in My build (very slowly progressing):
I've done it with just one flow frame: That seemed to be good.
This sounds great. I also want to do the same then to eliminate as much of uncertainties as possible from the very beginning. It is always frustrating to identify such bugs after assembling everything together. For sure, the final test is the one with the liquids. Looking forward for your first tests with the pumps installed.
-
Adopting the Contributor Covenant@kirk In general this is exactly the way how all of us should act here (and in all other open source projects). But it is always better to have something like this in advance and it does not harm. I highly welcome to have a written code of conduct. Thanks Kirk, for taking care.
-
My build (very slowly progressing)@sepi BTW, have you done a blow test with your assembled cell? Should be easier now as you just need to blow into one pipe while closing / opening the other one, right?
-
Blog: czahl's build@sepi Yeah, I made the mistake in my very first print and observed a small line on the surface due to the overlap / gap between the tapes. Then I realized that the tape width is approx. the width of the part, therefore I rearranged the tape to use just one in the middle. But the brims beside the tapes were not fasten enough to plate, therefore I added one above and one below...
BTW. after my approx. 10th print the tape is damaged now, so I need to replace it.
-
My build (very slowly progressing)@sepi Great job, your assembly is really looking quite good. Can't wait to see how it will perform.